Введение
All Roads Hat + Mittens
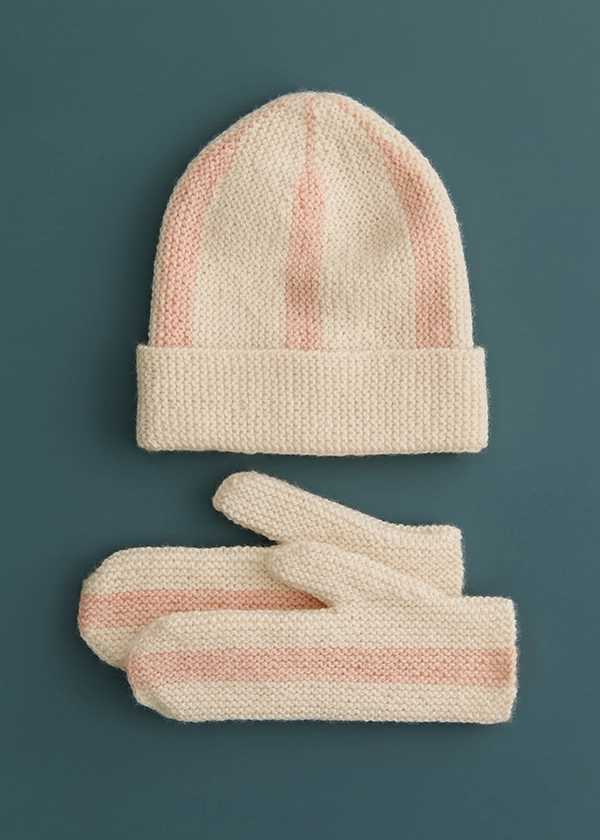
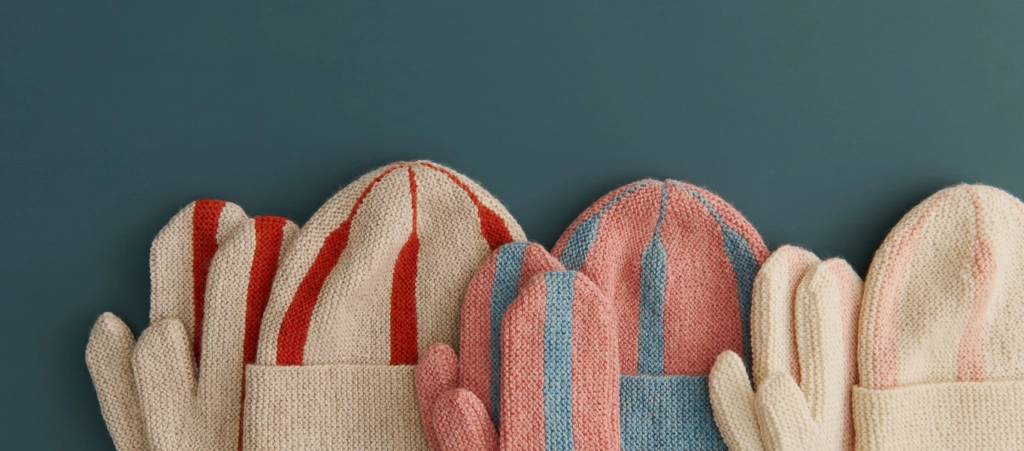
While most hat and mitten patterns are knit in the round, there are some advantages to taking the flat route. For our All Roads Hat + Mittens pattern, designed by Lili Tobias, working back and forth in rows allows you to easily create colorful stripes without any fancy shenanigans. It also means you can work garter stitch without purling, and maybe best of all, you can forego double pointed needles, too. All roads are leading to casting on for this charming set!
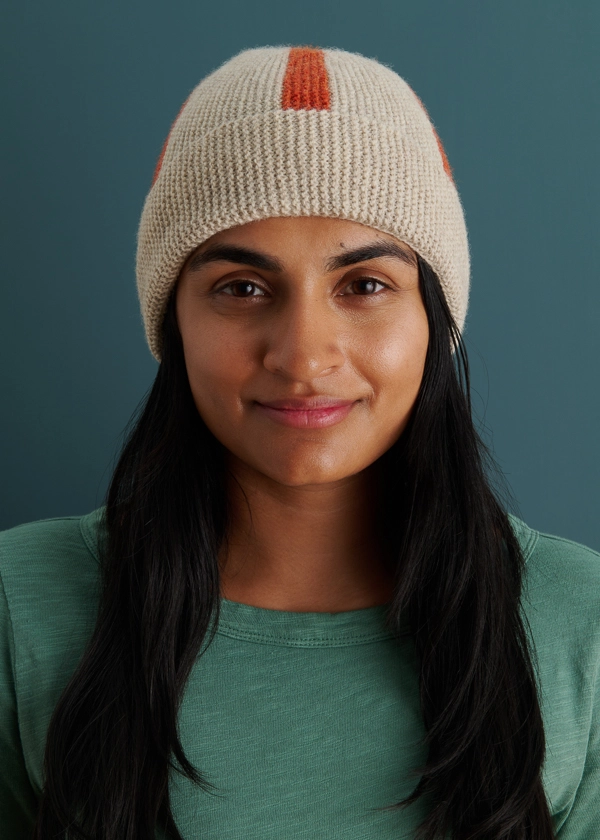
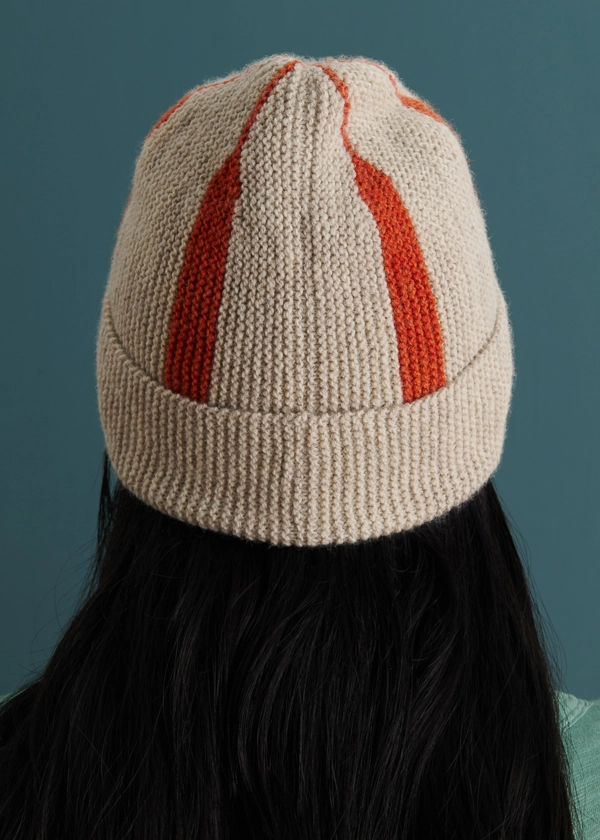
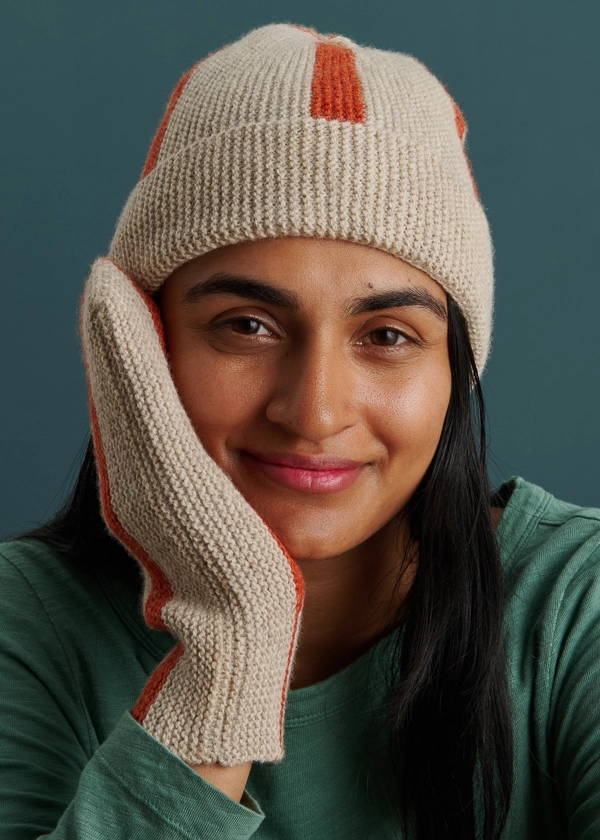
Lili has you knit your All Roads Hat in five wedges, using short rows to shape the crown and adding to the middle of each wedge a contrast stripe that thins into a line and converges at the peak with the other four stripes. At the end of the fifth wedge, you sew the cast-on and bind-off edges together to form your hat.
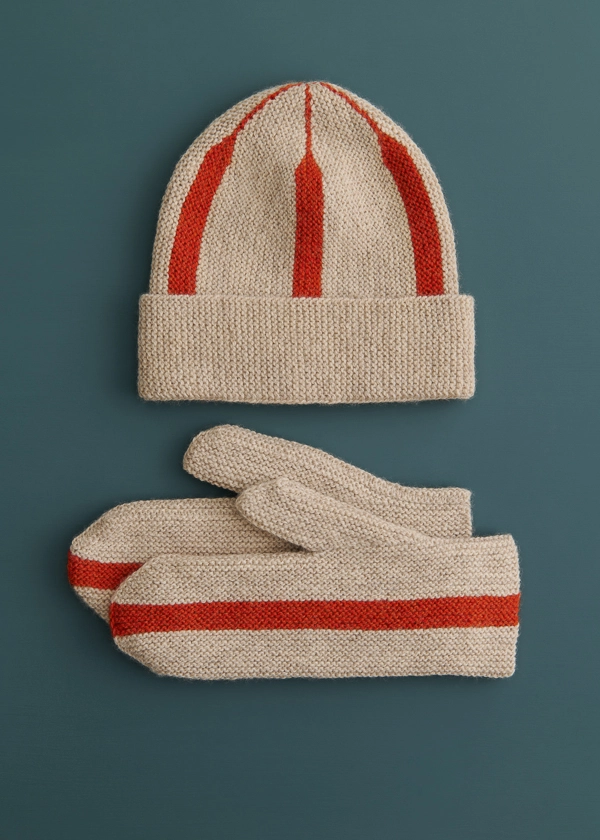
You then cast on a new piece for the brim and attach it to the hat as you knit it, a design detail with a few benefits. Attaching the brim in this way creates a crisp fold, as well as a seam that provides a little extra structure to super-stretchy garter stitch fabric. You also get to choose if you want the brim of your hat to be the main color or the contrast color. Who doesn’t love options? In the end, you seam the two ends of the brim, and you have arrived at a very cool hat!
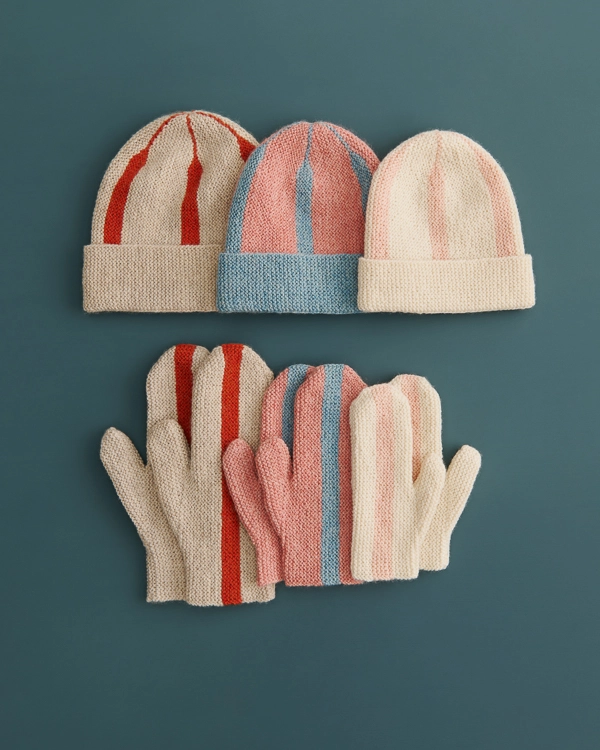
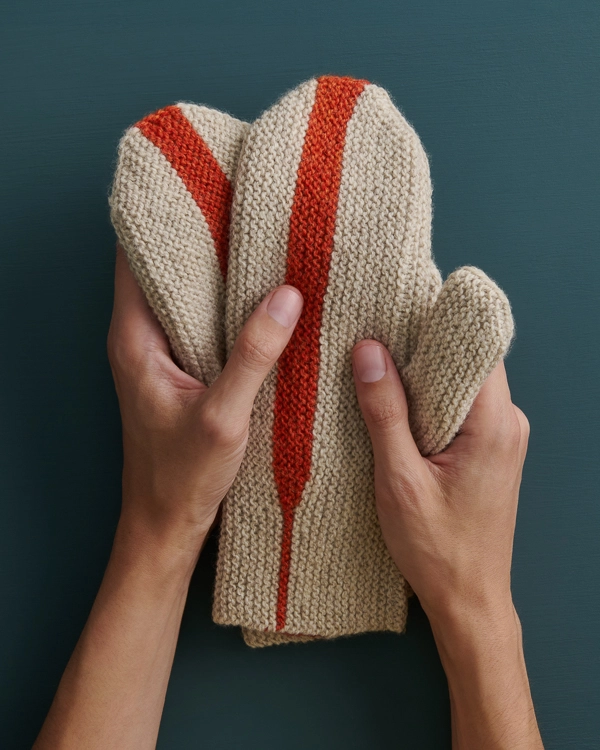
You knit the mittens in much the same way, casting on and knitting back and forth in garter stitch, increasing and decreasing to shape the tips of the fingers and using short rows to shape the base of the palm and thumb. You begin the left mitten with the hand and the right with the thumb, but they both have that eye-catching racing stripe right down the center. It thins into a line on the inside wrist, cleverly tying together with the design of the hat.
Our Good Wool yarn has the perfect palette and characteristics to help you answer the call of the open road. It is 100% Andean highland wool, which means Good Wool comes from sheep who live in the high altitudes of the Peruvian Altiplano, where it’s common to see temperatures well below freezing in the winter months. Adapting to these conditions, the wool these sheep make is particularly durable, springy, warm, and given all this, softer than you may expect!
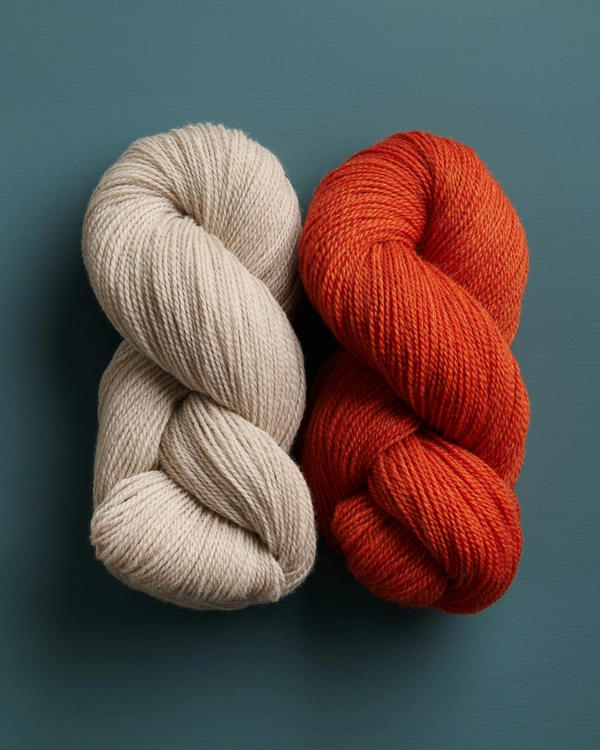
With two loosely spun plies, Good Wool has a ton of loft and bounce, and because its fibers aren’t held in place by a tight twist, they fluff out a bit once it’s washed (we often call this “blooming”). This makes it a wonderfully warm and cushiony choice!
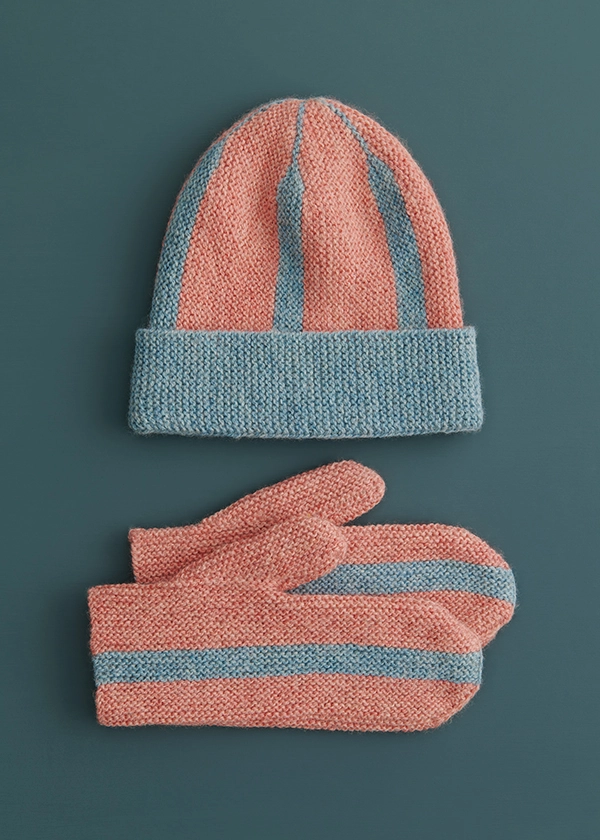
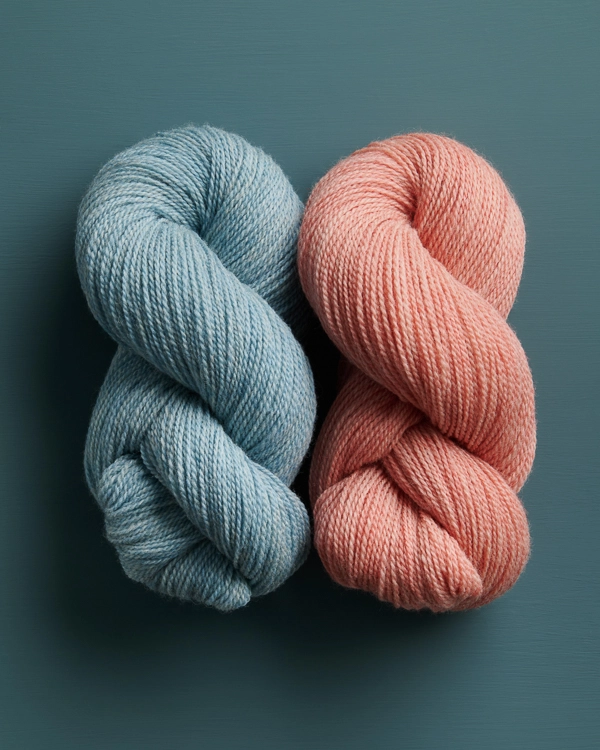
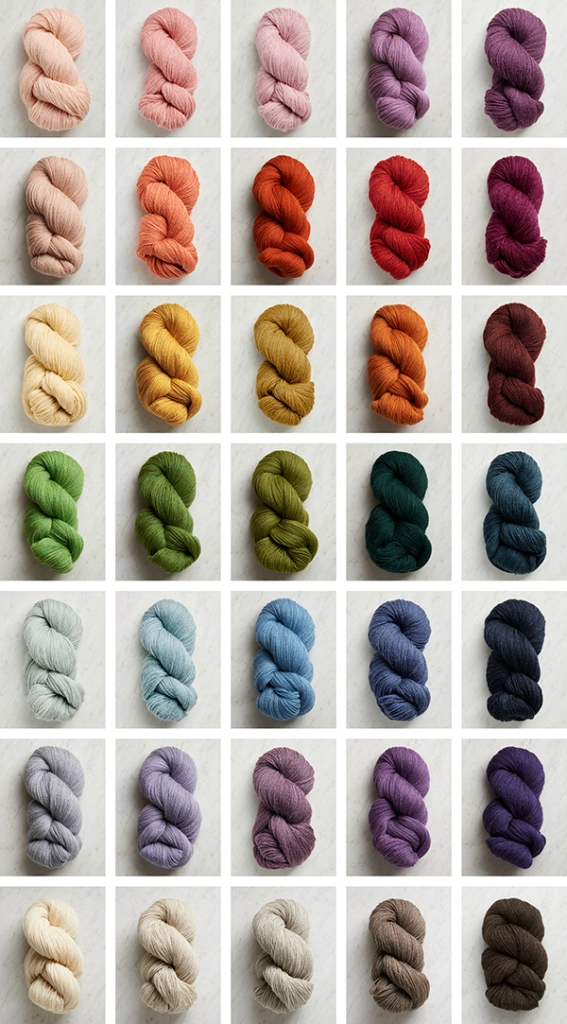
When you want a striking palette for color play, Good Wool has everything you need.
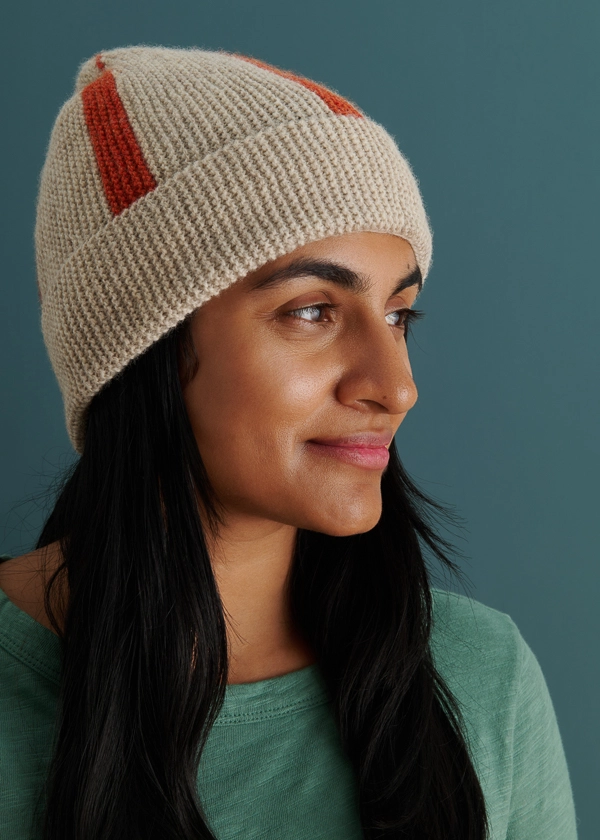
Good Wool comes in five colors grown by the sheep themselves, plus a rainbow of gorgeous hues dyed over these natural shades, creating beautifully heathered colors full of depth. With almost forty colors to choose from, you’re sure to find a pair that gets your wheels in motion!
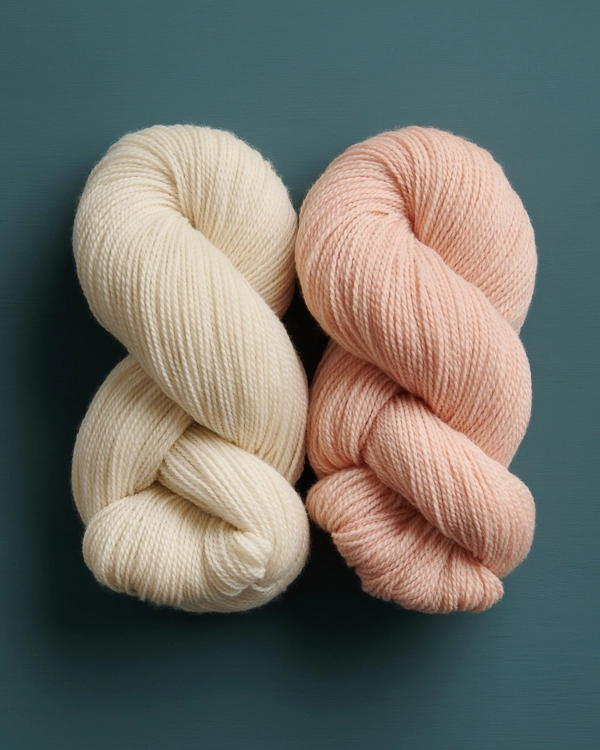
If you’re casting on for the set, you need one skein of your contrast color and one or two of your main color, depending on your size and brim color. So, find your favorites, and you’re off!
Yarn lovers, if you adore the yarn used in this project, you’ll love exploring all of our other yarn collections! Discover over 55 thoughtfully designed yarns in nearly every natural fiber and in every spectacular color you can imagine. Only available here at Purl Soho’s online yarn store, where every skein is created with care and your creativity in mind!
Pattern designed and written by Lili Tobias for Purl Soho. Lili spends most of her time knitting, listening to music, or doing both at the same time. See more from Lili on her Ravelry page.
Want to print this pattern? On desktop, find the “print” icon in the right margin, and on mobile, scroll to the end of the pattern for it. Use the on-screen instructions to remove anything you don’t want to print!
Materials
HAT
- Purl Soho’s Good Wool, 100% Andean highland wool yarn. Each skein of this sport weight yarn is approximately 383 yards/100 grams.
- If working Brim in Color A…
- Color A: 1 skein; approximately 155 (195, 245, 295, 345) total yards required
- Color B: 1 skein; approximately 35 (40, 40, 45, 45) total yards required
- If working Brim in Color B…
- Color A: 1 skein; approximately 85 (110, 135, 155, 175) total yards required
- Color B: 1 skein; approximately 105 (130, 155, 185, 215) total yards required
- If working Brim in Color A…
- US 4 (3.5 mm) 24-inch circular needles
- A stitch marker
MITTENS
- Purl Soho’s Good Wool, 100% Andean highland wool. Each skein is 383 yards/ 100 grams.
- Color A: 1 skein; approximately 110 (140, 205, 260, 305) total yards required
- Color B: 1 skein; approximately 20 (20, 25, 30, 30) total yards required
- US 4 (3.5 mm) 24-inch circular needles
- A stitch marker
NOTE: To make a Hat + Mittens set you’ll need 1 (1, 1-2, 2, 2) skein(s) of Color A and 1 skein of Color B, depending on your Brim color!
GAUGE
26½ stitches and 53 rows = 4 inches in garter stitch
SIZES
HAT
Baby (Toddler, Kid, Adult Small/Medium, Adult Medium/Large)
- Finished Circumference: 12¾ (14¼, 15¾, 17¼, 18¾) inches, comfortably stretching up to 5 inches
- Finished Height (uncuffed): 8¾ (9¾, 10¾, 11½, 12½) inches
- Finished Height (cuffed): 7 (7½, 8¼, 8¾, 9¼) inches
For help choosing a hat size, check out our complete guide on How to Knit the Right Hat Size!
MITTENS
Baby (Toddler, Kid, Adult Small/Medium, Adult Medium/Large)
- Finished Palm Circumference: 4¾ (5¼, 6½, 7, 7¾) inches
- Finished Wrist Circumference: 4 (4¾, 6, 6½, 7) inches
- Finished Length: 6½ (7½, 8¾, 10¼, 11) inches
We knit our samples in the following colors and sizes…
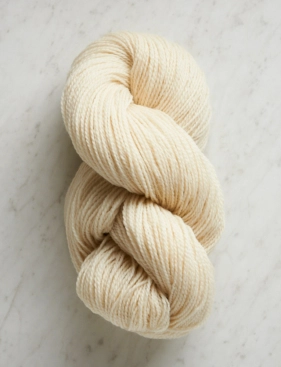
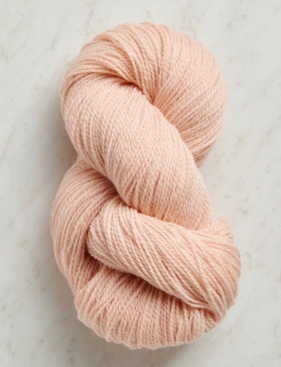
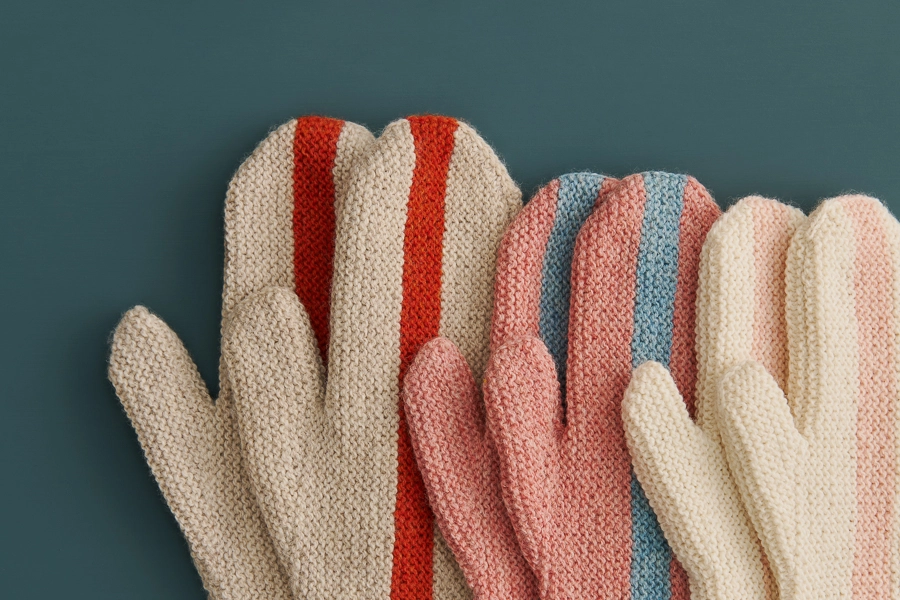
Toddler size: Color A is Heirloom White and Color B is Pink Salt (We used Color A for the Brim.)
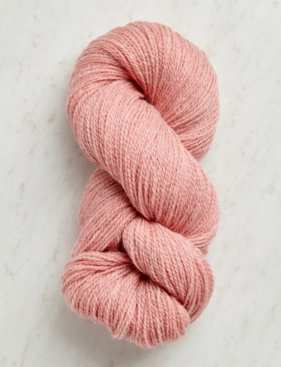
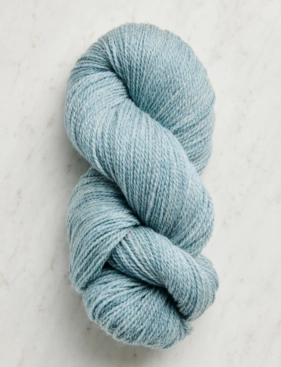
Kid size: Color A is Vintage Rose and Color B is Desert Blue (We used Color B for the Brim.)
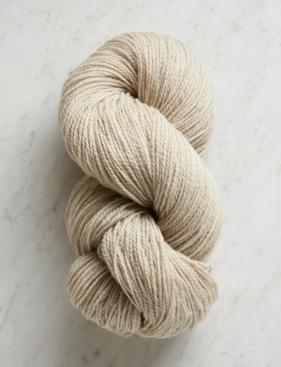
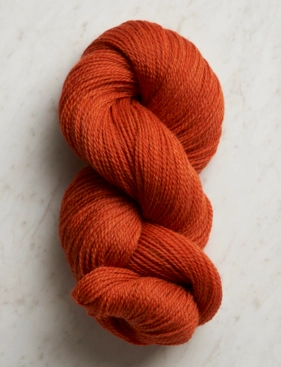
Adult Small/ Medium size: Color A is Winter Grass and Color B is Barn Door (We used Color A for the Brim.)
NOTES
CONSTRUCTION
Both Hat and Mittens are worked flat back and forth in rows, using short rows to shape the Crown for the Hat and the base of the Palm and the Thumb for the Mittens. For the Mittens, you will begin the Left Mitten with the Hand and begin the Right Mitten with the Thumb.
TWISTED WRP-T (TWISTED WRAP + TURN)
Bring yarn between needles to front of work, slip next stitch purlwise from left needle to right needle. Then, bring yarn to back of work, and return slipped stitch to left needle. Bring yarn between needles to front of work, and finally, turn work so opposite side is facing you, and working yarn is at the back of the work.
NOTE: For help with this technique, visit our Striped Half + Half Triangles Wrap pattern and scroll down to the Notes section.
KNITTING WRAPPED STITCH WITH WRAP
Use tip of right needle to pick up the wrap, inserting needle from front to back. Place the wrap onto left needle, so wrap is first stitch on needle and wrapped stitch is second, then knit the two together as you normally would.
SLIP STITCHES
Slip all stitches purlwise.
PICKING UP STITCHES
For the cleanest pick-up edge, insert the needle into the outer most bump of the garter ridge edge.
NOTE: Visit purlsoho.com/create/picking-up-stitches and scroll down to the “Along A Vertical Edge: Garter Stitch, Into the Ridge” section to see exactly how to pick up stitches for this project.
MAKE 1 BACKWARDS LOOP
With working yarn, create a loop so the strand of yarn closer to the ball of yarn is in front, insert needle from front to back of loop. Pull the yarn to tighten the loop on the needle.
NOTE: For more information on this technique, please visit our Make 1 Backwards Loop Tutorial.
M1R + M1L (MAKE 1 RIGHT + LEFT)
Make 1 Right: Use left needle to pick up strand (or “bar”) between last stitch and next stitch, from back to front. Knit into front leg. [1 stitch increased]
Make 1 Left: Use left needle to pick up strand between last stitch and next stitch, from front to back. Knit into back leg. [1 stitch increased]
NOTE: For more help with these increases, visit our Make 1 Right (M1R) + Make 1 Left (M1L) tutorial.
HAT PATTERN
BODY + CROWN
With Color A, cast on 39 (43, 47, 49, 51) stitches. We used a basic Long Tail Cast On.
Set-Up Row (wrong side): Knit to end of row.
WORK WEDGE 1
Short Row 1 (right side): Knit to last 2 stitches, twisted wrp-t (see Notes).
Short Row 2 (wrong side): Knit to end of row.
Short Row 3: Knit to two stitches before wrapped stitch, twisted wrp-t.
Short Row 4: Knit to end of row.
Repeat Short Rows 3 and 4 one (2, 3, 4, 5) more time(s).
Short Row 5: K25 (27, 29, 29, 29), twisted wrp-t.
Short Row 6: Knit to end of row.
Short Row 7: Knit to next wrapped stitch, knit wrapped stitch with its wrap (see Notes), k1, twisted wrp-t.
Short Row 8: Knit to end of row.
Cut Color A, and join Color B.
With Color B, repeat Short Rows 7 and 8 two more times.
Next Row (right side): Knit to end of row, knitting wrapped stitches with their wraps as you come to them.
Next Row (wrong side): Knit to end of row.
Short Row 9: K31 (33, 35, 35, 35), twisted wrp-t.
Short Row 10: Knit to end of row.
Short Row 11: Knit to 2 stitches before wrapped stitch, twisted wrp-t.
Short Row 12: Knit to end of row.
Cut Color B, and join Color A.
With Color A, repeat Short Rows 11 and 12 two more times.
Short Row 13: K33 (35, 37, 37, 37), knitting stitches with their wraps as you come to them, twisted wrp-t.
Short Row 14: Knit to end of row.
Short Row 15: Knit to wrapped stitch, knit wrapped stitch with its wrap, k1, twisted wrp-t.
Short Row 16: Knit to end of row.
Repeat Short Rows 15 and 16 one (2, 3, 4, 5) more time(s).
Knit 4 rows even, knitting the final wrapped stitch with its wrap on the first row.
WORK WEDGES 2–5
Repeat Wedge 1 four more times, ending the last repeat by knitting 2 rows even (instead of 4).
With right side facing you, bind off all stitches.
Cut yarn, leaving a long tail.
SEW TOGETHER
Thread tail onto a tapestry needle, and with right side still facing you, sew needle through outermost purl bump of each garter ridge along the selvage that is closest to the tail. When you reach the corner, pull the yarn tight so that the selvage gathers together. Thread the yarn through the circle of stitches one more time to secure. Pull tight.
Still using the tail, sew together the bind-off and cast-on edges, making sure that the bottom corners will align as you go. Sew the bottom corners twice to secure. For help, visit our Seaming Stockinette Stitch Horizontally tutorial (it’s the same idea for garter stitch!).
BRIM
NOTE: You can work the Brim in either Color A or Color B, depending on which style you prefer!
Using either Color A or Color B, cast on 19 (22, 25, 28, 31) stitches. We used a basic Long Tail Cast On.
With right side of hat facing you and beginning at seam, you will now join the Brim to the hat. Here’s how…
Row 1 (wrong side): K12 (14, 16, 18, 20), place marker (pm), slip 1 (see Notes) with yarn in front (wyif), knit to last stitch, slip 1 with yarn in back (wyib), pick up and knit 1 stitch (see Notes) from first garter ridge on right side of Body, pass slipped stitch over (psso) to join Brim to Body.
Row 2 (right side): Knit to marker, slip marker (sm), knit to end of row.
Row 3: Knit to marker, sm, slip 1 wyif, knit to last stitch, slip 1 wyib, pick up and knit 1 stitch from next garter ridge of Body, psso to join Brim to Body.
Repeat Rows 2 and 3 until you’ve picked up and knit a stitch from every garter ridge, ending with Row 3.
With right side of Brim facing you, bind off all stitches.
Cut yarn, leaving a long tail.
FINISHING
Thread tail onto a tapestry needle, and with right side still facing you, seam cast-on edge to bind-off edge using the same technique as you used for the Body.
Weave in ends and gently wet block. Fold Brim up along slip stitch line, and enjoy your hat!
MITTEN PATTERN
LEFT MITTEN
BODY
With Color A, using a basic Long Tail Cast On and leaving a long tail, cast on 81 (91, 103, 121, 127) stitches.
Set-Up Row (wrong side): K40 (45, 51, 60, 63), place marker (pm), p1, knit to end of row.
Row 1 (right side): Knit to 1 stitch before marker, make 1 right (m1R, see Notes), k1, slip marker (sm), make 1 left (m1L, see Notes), knit to end of row. [2 stitches increased]
Row 2 (wrong side): Knit to marker, sm, slip 1 (see Notes) with yarn in front (wyif), knit to end of row.
Repeat Rows 1 and 2 two (4, 6, 7, 9) more times. [87 (101, 117, 137, 147) stitches]
BABY, TODDLER, KID, + ADULT SMALL/MEDIUM SIZES ONLY
Next Row (right side): Knit to marker, sm, knit to end of row.
Next Row (wrong side): Knit to marker, sm, slip 1 wyif, knit to end of row.
Repeat last 2 rows 1 (0, 0, 0, –) more time(s).
ALL SIZES
Cut Color A, and join Color B.
Short Row 1 (right side): Knit to marker, sm, k29 (34, 39, 47, 49), twisted wrp-t (see Notes).
Short Row 2 (wrong side): Knit to marker, sm, slip 1 wyif, knit to end of row.
Short Row 3: Knit to marker, sm, knit to wrapped stitch, knit wrapped stitch with its wrap (see Notes), k2, twisted wrp-t.
Short Row 4: Knit to marker, sm, slip 1 wyif, knit to end of row.
Row 5: Knit to marker, sm, knit to end of row, knitting wrapped stitches with their wraps as you come to them.
Row 6: Knit to marker, sm, slip 1 wyif, knit to end of row.
Short Row 7: Knit to marker, sm, k33 (38, 43, 51, 53), twisted wrp-t.
Short Row 8: Knit to marker, sm, slip 1 wyif, knit to end of row.
Short Row 9: Knit to marker, sm, knit to 2 stitches before wrapped stitch, twisted wrp-t.
Short Row 10: Knit to marker, sm, slip 1 wyif, knit to end of row.
Cut Color B, and join Color A.
BABY, TODDLER, KID, + ADULT SMALL/MEDIUM SIZES ONLY
Next Row (right side): Knit to marker, sm, knit to end of row, knitting wrapped stitches with their wraps as you come to them.
Next Row (wrong side): Knit to marker, sm, slip 1 wyif, knit to end of row.
Repeat last 2 rows 1 (0, 0, 0, –) more time(s).
ALL SIZES
Next Row (right side): Knit to 3 stitches before marker, slip slip knit (ssk), k1, sm, knit 2 together (k2tog), knit to end of row. [2 stitches decreased]
Next Row (wrong side): Knit to marker, sm, slip 1 wyif, knit to end of row.
Repeat last two rows 2 (4, 6, 7, 9) more times. [81 (91, 103, 121, 127) stitches remain]
Bind-Off Row (right side): K20 (24, 28, 35, 37), loosely bind off 41 (43, 47, 51, 53) stitches, k19 (23, 27, 34, 36) to end of row. [20 (24, 28, 35, 37) stitches on either side of bound-off stitches]
THUMB
Set-Up Row (wrong side): K20 (24, 28, 35, 37), use a Make 1 Backwards Loop (see Notes) to cast on 17 (19, 23, 27, 29) stitches, knit to end of row. [57 (67, 79, 97, 103) stitches]
Short Row 1 (right side): K29 (34, 40, 49, 52), pm, k10 (11, 13, 15, 16), twisted wrp-t.
Short Row 2 (wrong side): Knit to marker, sm, slip 1 wyif, k10 (11, 13, 15, 16), twisted wrp-t.
Short Row 3: Knit to marker, sm, knit to wrapped stitch, knit wrapped stitch with its wrap, k1, twisted wrp-t.
Short Row 4: Knit to marker, sm, slip 1 wyif, knit to wrapped stitch, knit wrapped stitch with its wrap, k1, twisted wrp-t.
Repeat Short Rows 3 and 4 two (2, 3, 3, 3) more times.
Short Row 5 (right side): Knit to 3 stitches before marker, ssk, k1, sm, k2tog, knit to wrapped stitch, knit wrapped stitch with its wrap, k1, twisted wrp-t. [2 stitches decreased]
Short Row 6 (wrong side): Knit to marker, sm, slip 1 wyif, knit to wrapped stitch, knit wrapped stitch with its wrap, k1, twisted wrp-t.
Repeat Short Rows 5 and 6 one (2, 2, 3, 3) more time(s). [53 (61, 73, 89, 95) stitches remain]
Short Row 7 (right side): Knit to marker, sm, knit to end of row, knitting wrapped stitches with their wraps as you come to them.
Next Row (wrong side): Knit to marker, remove marker, slip 1 wyif, knit to end of row, knitting wrapped stitch with its wrap as you come to it.
With right side facing you, bind off all stitches loosely. Cut yarn, leaving a long tail.
SEAMING
Use long tails to seam all edges together. For help, visit our Seaming Stockinette Stitch Horizontally tutorial. It’s the same idea for garter stitch!
Go on to Finishing section, below.
RIGHT MITTEN
THUMB
With Color A, using a basic Long Tail Cast On and leaving a long tail, cast on 53 (61, 73, 89, 95) stitches.
Set-Up Row (wrong side): K26 (30, 36, 44, 47), pm, p1, knit to end of row.
Short Row 1 (right side): Knit to 1 stitch before marker, m1R, k1, sm, m1L, k18 (20, 23, 29, 29), twisted wrp-t. [55 (63, 75, 91, 97) stitches]
Short Row 2: Knit to marker, sm, slip 1 wyif, k19 (21, 24, 30, 30), twisted wrp-t.
Short Row 3: Knit to 1 stitch before marker, m1R, k1, sm, m1L, knit to 2 stitches before wrapped stitch, twisted wrp-t. [2 stitches increased]
Short Row 4: Knit to marker, sm, slip 1 wyif, knit to 2 stitches before wrapped stitch, twisted wrp-t.
Repeat Short Rows 3 and 4 zero (1, 1, 2, 2) more time(s). [57 (67, 79, 97, 103) stitches]
Short Row 5 (right): Knit to marker, sm, knit to 2 stitches before wrapped stitch, twisted wrp-t.
Short Row 6 (wrong): Knit to marker, sm, slip 1 wyif, knit to 2 stitches before wrapped stitch, twisted wrp-t.
Repeat Short Rows 5 and 6 three (3, 4, 4, 4) more times, removing marker on final row.
Short Row 7 (right side): Knit to marker, sm, knit to end of row, knitting wrapped stitches with their wraps as you come to them.
Next Row (wrong side): Knit to marker, remove marker, slip 1 wyif, knit to end of row, knitting wrapped stitch with its wrap as you come to it.
Bind-Off Row (right side): K20 (24, 28, 35, 37), loosely bind off 17 (19, 23, 27, 29) stitches, k19 (23, 27, 34, 36) to end of row. [20 (24, 28, 35, 37) stitches on either side of bound-off stitches]
BODY
Set-Up Row (wrong side): K20 (24, 28, 35, 37), use a Make 1 Backwards Loop to cast on 41 (43, 47, 51, 53) stitches, knit to end of row. [81 (91, 103, 121, 127) stitches]
Row 1 (right side): K41 (46, 52, 61, 64), pm, knit to end of row.
Row 2 (wrong side): Knit to marker, sm, slip 1 wyif, knit to end of row.
Row 3: Knit to 1 stitch before marker, m1R, k1, sm, m1L, knit to end of row. [2 stitches increased]
Row 4: Knit to marker, sm, slip 1 wyif, knit to end of row.
Repeat Rows 3 and 4 two (4, 6, 7, 9) more times. [87 (101, 117, 137, 147) stitches]
BABY, TODDLER, KID, + ADULT SMALL/MEDIUM SIZES ONLY
Next Row (right side): Knit to marker, sm, knit to end of row.
Next Row (wrong side): Knit to marker, sm, slip 1 wyif, knit to end of row.
Repeat last 2 rows 1 (0, 0, 0, –) more time(s).
ALL SIZES
Cut Color A, and join Color B.
Short Row 1 (right side): Knit to marker, sm, k29 (34, 39, 47, 49), twisted wrp-t.
Short Row 2 (wrong side): Knit to marker, sm, slip 1 wyif, knit to end of row.
Short Row 3: Knit to marker, sm, knit to wrapped stitch, knit wrapped stitch with its wrap, k2, twisted wrp-t.
Short Row 4: Knit to marker, sm, slip 1 wyif, knit to end of row.
Row 5: Knit to marker, sm, knit to end of row.
Row 6: Knit to marker, sm, slip 1 wyif, knit to end of row.
Short Row 7: Knit to marker, sm, k33 (38, 43, 51, 53), twisted wrp-t.
Short Row 8: Knit to marker, sm, slip 1 wyif, knit to end of row.
Short Row 9: Knit to marker, sm, knit to 2 stitches before wrapped stitch, twisted wrp-t.
Short Row 10: Knit to marker, sm, slip 1 wyif, knit to end of row.
Cut Color B, and join Color A.
BABY, TODDLER, KID, + ADULT SMALL/MEDIUM SIZES ONLY
Next Row (right side): Knit to marker, sm, knit to end of row, knitting wrapped stitches with their wraps as you come to them.
Next Row (wrong side): Knit to marker, sm, slip 1 wyif, knit to end of row.
Repeat last 2 rows 1 (0, 0, 0, –) more time(s).
ALL SIZES
Next Row (right side): Knit to 3 stitches before marker, ssk, k1, sm, k2tog, knit to end of row. [2 stitches decreased]
Next Row (wrong side): Knit to marker, sm, slip 1 wyif, knit to end of row.
Repeat last two rows 2 (4, 6, 7, 9) more times. [81 (91, 103, 121, 127) stitches]
Bind-Off Row (right side): Bind off all stitches knitwise.
Seam as for Left Mitten.
FINISHING
Weave in remaining ends, and gently wet block both mittens.
Share your progress and connect with the community by tagging your pics with #PurlSoho. We can’t wait to see what you make!
LEARN ABOUT GOOD WOOL + ALL OUR BEAUTIFUL YARNS
Good Wool adds loads of character, beauty, and integrity to this knit! A sport-weight yarn whose lofty 2-ply spin can also bloom into a light worsted/DK-weight yarn, Good Wool is made from 100% Andean highland wool, a toothy fiber with a deeply natural appeal. This yarn has a spectacular palette of complex and subtly varied colors, including 5 undyed shades. Very close to the hearts of our customers, Good Wool is a true knitter’s yarn!
More Knitting Patterns
- Be sure to explore our vast collection of (mostly free!) Good Wool knitting patterns and cast on!
More Sport-Weight Yarns + Light Worsted/DK-Weight Yarns
- Shop our entire collection of sport-weight yarn
- Shop our entire collection of light worsted/DK-weight yarns (What does DK-weight yarn mean, really? Our guide to DK yarn will answer your questions and demystify.)
- If you want to use a different yarn, be sure to take the time to get the correct gauge. Need help? Check our All About Gauge Tutorial, our Yarn Substitution article, and our Complete Guide To Yarn for lots of helpful information.
More Yarns With Similar Fiber
- Shop wool yarn
 TO TOP
Buy Good Wool
 PRINT
TO TOP