Description of the “Lace Toujours” socks
Let's knit lace socks together that will delight you and your loved ones. Happy knitting!

Concept
It turns out that lace socks can become an indispensable element of a basic wardrobe. Thanks to the delicate combination of lace patterns, the socks look very airy and stylish, while also suiting any look you choose. In this item, you can bring any sock fantasies to life: try fluffy yarn, add lurex, or maybe even sequins.
Sizes
The socks are presented in three children's sizes (1/2/3) and three adult sizes (4/5/6). When choosing a size, focus primarily on ankle circumference — as when buying shoes (child's, slim, standard, or larger-than-standard foot).
Main parameters by size:
- Size 1 (6 months – 3 years, foot 18–23, ankle 14.5–16.5 cm): CO 48 sts.
- Size 2 (3.5–5 years, foot 24–29, ankle 16.5–17.5 cm): CO 52 sts.
- Size 3 (6–10 years, foot 30–35, ankle 18–20 cm): CO 56 sts.
- Size 4 (foot 36–38, ankle 22–24 cm): CO 60 sts.
- Size 5 (foot 39–40, ankle 25–26 cm): CO 64 sts.
- Size 6 (foot 41–44, ankle 27–28 cm): CO 68 sts.
Leg height (not including the “Picot edge,” which adds another about 1 cm) by size: 7.5 cm (3 repeats) / 10 cm (4 repeats) / 12.5 cm (5 repeats) / 17.5 cm (7 repeats — for sizes 4, 5, 6). The leg length can be adjusted at your discretion, following the recommendations from the section on knitting the leg so as not to disrupt the pattern interlacement.
Main heel and foot parameters by size:
- Heel flap (number of stitches): 25 / 27 / 29 / 31 / 33 / 35, flap height — 14 / 18 / 22 / 30 / 32 / 34 rows.
- Heel turn: decreases on each side 4 / 5 / 5 / 5 / 6 / 6, total after the turn 17 / 17 / 19 / 21 / 21 / 23 sts remain.
- Picking up stitches from the edge (on each side): 8 / 10 / 12 / 16 / 17 / 18 sts; total stitches after picking up: 56 / 62 / 70 / 82 / 86 / 92.
- Gusset decreases (in two gussets): 4 / 5 / 7 / 11 / 11 / 12.
- Toe length: 2.7 / 3 / 3.5 / 4.3 / 4.3 / 4.5 cm.
Approximate foot length: 9–14.5 / 15–18 / 19.5–22 / 24–24.5 / 25–26 / 26.5–29 cm. We knit the main foot length (the section between the heel and the toe): for size 1 — 1.5–3.5 repeats, size 2 — 3.5–4.5, size 3 — 5–5.5, size 4 — 5.5–6, size 5 — 6–6.5, size 6 — 6.5–7.5 repeats (depending on foot length).
Reference foot lengths for teenagers and adults: size 36/37 — 24 cm; 38/39 — 25 cm; 40/41 — 26.5 cm; 42/43 — 28 cm; 44/45 — 29 cm.
The leg and foot length can be adjusted at your discretion. I recommend trying on the sock before starting the toe or using a blocker of the required size.
Gauge
To hit the size accurately, be sure to knit a swatch from the chosen yarn, block it, and measure the gauge:
in stockinette stitch 10 × 10 cm = 36 sts × 56 rows
in the lace pattern 10 × 10 cm = 36 sts × 48 rows
If you get fewer stitches — take smaller needles, if more — larger needles.
Materials and tools
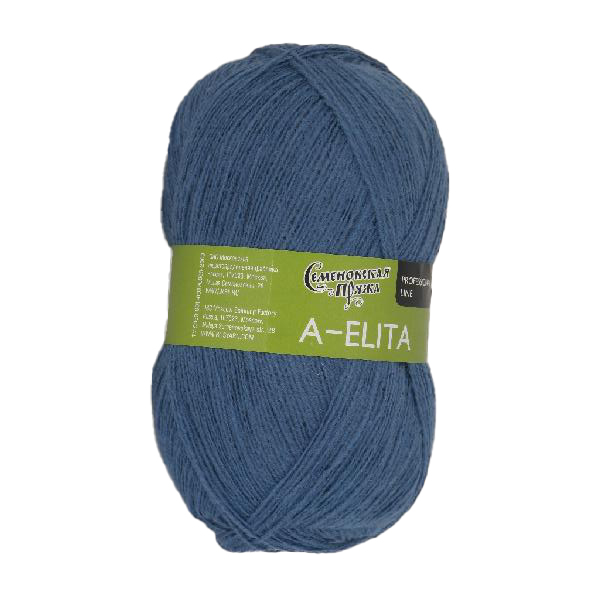
- Any classic sock yarn with a yardage of 200–210 m / 50 g.
- Circular needles for knitting the “Picot edge” 2–2.25 mm, 80–100 cm long.
- Circular needles in the main size 2.25–2.5 mm, 80–100 cm long.
- Sewing needle, crochet hook, stitch markers, blockers, scissors.

Construction
The socks are knitted as a single piece from the top down (from the cuff edge to the toe) using the Magic Loop method or on 5 DPNs. Techniques and patterns used:
- the upper part of the socks is finished with a “Picot edge”;
- the leg is knitted from a combination of lace patterns;
- “Horseshoe” heel;
- “Ribbon” toe (closed with Kitchener stitch).

Abbreviations
-- — repeating element; k — knit stitch; p — purl stitch; ssk/k2tog — knit 2 together with a left/right slant; p2tog — purl 2 together; M (M1, M2) — marker; BOR — beginning-of-round marker; WS — wrong side; RS — right side; extra — additional; edge — edge stitch (at the beginning of the row, slip without knitting; at the end of the row, purl it); st — stitch; R, row — row; rep — pattern repeat; blocking — wet blocking.
Order of work
- Let's start with casting on stitches for the “Picot edge” (upper part of the leg) and sew its two layers together.
- Move on to the main part of the leg and knit it to the required length.
- Shape the heel (heel flap, heel turn, picking up stitches along the heel edge).
- Knit the foot (gusset, main length).
- Finish by knitting the toe.
Patterns

1. Leg
1.1 “Picot edge”
We start with the upper trim. With a crochet hook and additional contrast-color yarn, make 49 / 53 / 57 / 61 / 65 / 69 chain stitches. For the “Picot edge,” it is convenient to use needles 0.25–0.5 mm smaller than the main ones.
Then, from the resulting chain-braid, with the main yarn, pick up 48 / 52 / 56 / 60 / 64 / 68 sts in a 1×1 rhythm, plus 1 stitch to join into a round. Place the beginning-of-round marker before this joining stitch — it will be considered the first stitch of the first row.

Next, knit the “Picot edge” according to Chart 3 / 6 / 9 / 12 / 15 / 18 (depending on the size). It is constructed as follows: first knit 5 rows in stockinette stitch, then one row of “holes” (alternating two stitches knitted together and a yarn over) — this will be the fold line of the picots — and again several rows in stockinette stitch. Work all yarn overs in the following rows as knit stitches. After that, form the picot edge by joining the stitches of the last row with the “loops” of the cast-on row so that the fabric folds in half and a neat three-dimensional edge is formed. Remove the additional yarn.


1.2 Leg (pattern)
Reset the row counter. If smaller needles were used for the Picot edge, switch to the main needles.
For the lace pattern you will need a yarn over, ssk, and k2tog — the sequence of movements is shown in the figures below.


The leg is knitted in the round according to Chart 4 / 7 / 10 / 13 / 16 / 19 (for your size). The pattern is a combination of two lace motifs — pattern "A" and pattern "B" (Charts 1 and 2), separated by tracks of purl and knit stitches. The pattern repeat is 12 rows high. All odd rows are lace (with yarn overs and decreases); in even rows the pattern is worked as established, and yarn overs are knitted.
Repeat the 12-row repeat: for children's sizes — 2 / 3 / 4 more times, for adult sizes — 6 times, or until the desired leg length. Important: finish the leg with a complete repeat — through row 12 inclusive.


2. Heel
2.1 Heel flap
From the BOR marker, separate 25 / 27 / 29 / 31 / 33 / 35 sts for the heel flap. Leave the remaining 23 / 25 / 27 / 29 / 31 / 33 sts on the cable and do not work them temporarily.
Work the heel flap in turning rows in stockinette stitch. Make the first and last stitch of each row edge stitches: at the beginning of the row slip without working, at the end of the row purl it — this forms a neat braid along the edges, from which we will later pick up stitches. Alternate knit and purl rows until you have worked 14 / 18 / 22 / 30 / 32 / 34 rows of the heel flap. The number of rows can be adjusted if necessary.

2.2 Heel turn
Reset the row counter. Conditionally divide the heel stitches into three parts (two side parts and a central part):
- Size 1 — 8/9/8;
- Size 2 — 9/9/9;
- Size 3 — 9/11/9;
- Size 4 — 10/11/10;
- Size 5 — 11/11/11;
- Size 6 — 11/13/11.
Turn the heel with short rows: work the central part, at the end of the row incorporate one stitch from the side part (ssk on the RS and p2tog on the WS), turn the work after each decrease. In this way, gradually incorporate the side stitches into the central part, "eating them up" from both sides.
In total, make 4 / 5 / 5 / 5 / 6 / 6 decreases on each side. After the turn, 17 / 17 / 19 / 21 / 21 / 23 sts remain on the needles.


Next, proceed to picking up stitches from the edge braid. Along the first heel edge, pick up 7 / 9 / 11 / 15 / 16 / 17 sts plus 1 more st not from the braid (in the corner, so that no hole forms) — 8 / 10 / 12 / 16 / 17 / 18 sts total.


Then work the front (upper) part of the foot in pattern — these are the previously set-aside 23 / 25 / 27 / 29 / 31 / 33 sts. Here we stopped on row 12 of the repeat, so continue the pattern from row 1 according to Chart 5 / 8 / 11 / 14 / 17 / 20.
When you reach the second heel edge, by analogy with the first, pick up 7 / 9 / 11 / 15 / 16 / 17 sts plus 1 st not from the braid — 8 / 10 / 12 / 16 / 17 / 18 sts total.
After the picked-up stitches, knit another 8 / 8 / 9 / 10 / 10 / 12 sts and place the BOR marker. Proceed to the foot.

3. Foot
First work the gusset, then work the main length straight.
3.1 Gusset

The upper part of the foot continues in pattern (Chart 5 / 8 / 11 / 14 / 17 / 20), the lower part in stockinette stitch. Mark the boundaries of the upper part with markers M1 and M2.
Now decrease the stitches of the lower part every other row, forming two symmetrical gussets: before M1 work k2tog, after M2 — ssk. Make the decreases in even rows; in odd rows work without decreases. Continue in this way until the extra stitches picked up from the edge have been decreased.
In total, work 4 / 5 / 7 / 11 / 11 / 12 decreases in each of the two gussets, so that the original (cast-on) number of stitches remains on the needles again — 48 / 52 / 56 / 60 / 64 / 68 sts.
3.2 Main foot length
Next, work the lower part of the foot without decreases in stockinette stitch, and continue the upper part in pattern (Chart 5 / 8 / 11 / 14 / 17 / 20) to the desired length. Markers M1 and M2 can be removed, leaving only the BOR marker.
In this part of the foot work: for size 1 — 1.5–3.5 repeats, size 2 — 3.5–4.5, size 3 — 5–5.5, size 4 — 5.5–6, size 5 — 6–6.5, size 6 — 6.5–7.5 repeats (depending on foot length). Refer to the foot and toe length data in the "Sizes" section. I recommend trying the sock on before knitting the toe.
4. Toe
Before knitting the toe, redistribute the stitches evenly. There are now 25 / 27 / 29 / 31 / 33 / 35 sts of the lower part of the foot and 23 / 25 / 27 / 29 / 31 / 33 sts of the upper part on the needles. To equalize the parts, make 2 more decreases along the bottom of the foot — as a result, we get 23 / 25 / 27 / 29 / 31 / 33 sts in each part.
4.1 Knitting the toe
Mark the boundaries of the upper and lower parts with markers M1 and M2. Narrow the toe with symmetrical decreases on four sides: before each marker work k2tog, after each — ssk (leaving 1 edge knit stitch between the decrease and the marker). Make decreases in odd rows; work even rows without decreases in knit stitches.
Alternate decrease rows and plain rows until the following remains on the needles:
- 22 sts for sizes 1/2/3 (11 sts each on the upper and lower parts);
- 26 sts for sizes 4/5/6 (13 sts each on the upper and lower parts).
4.2 Closing the toe
Join the remaining stitches with Kitchener stitch. After finishing the work, weave in the yarn ends and block the sock. Use sock blockers for drying — with them the socks will acquire a beautiful shape.


Our lace socks are ready!

5. Charts
5.1 Charts for Size 1 for 48 sts (child)
Chart 3 — Picot Edge, Chart 4 — Leg, Chart 5 — Instep. Key — in Figure 17.


5.2 Charts for Size 2 for 52 sts (child)
Chart 6 — Picot Edge, Chart 7 — Leg, Chart 8 — Instep. Key — in Figure 18.


5.3 Charts for Size 3 for 56 sts (child)
Chart 9 — Picot Edge, Chart 10 — Leg, Chart 11 — Instep. Key — in Figure 19.


5.4 Charts for Size 4 for 60 sts (adult)
Chart 12 — Picot Edge, Chart 13 — Leg, Chart 14 — Instep. Key — in Figure 20.


5.5 Charts for Size 5 for 64 sts (adult)
Chart 15 — Picot Edge, Chart 16 — Leg, Chart 17 — Instep. Key — in Figure 21.

5.6 Charts for Size 6 for 68 sts (adult)
Chart 18 — Picot Edge, Chart 19 — Leg, Chart 20 — Instep. Key — in Figure 22.