Введение
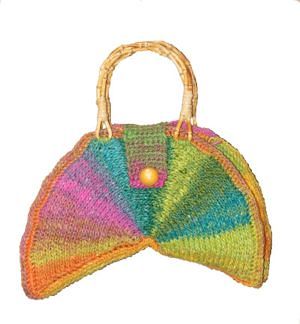
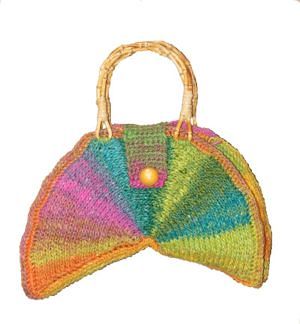
Color Wheel Bag
designed by Kim Guzman © May 2009
Please read my Terms of Use
Technique: Tunisian Crochet
Purchase Ad-Free PDF
Downloadable Pattern Available At:
Ravelry
Finished Size
approx. 13.5” across and 8” high (not including handles)
Materials
Noro Taiyo (220 yds per skein): 2 skeins (shown in #0011)
Suggested hook size: Size 5mm [US H-8] 14” Tunisian Afghan Hook and Size 4mm [US G-6] regular crochet hook
2 5-inch pre-purchased purse handles
1” round shank button
Needle (for weaving ends and attaching handles)
Straight pins (optional)
Cut pieces of plastic canvas to fit the bag in order to maintain the shape.
Gauge
With afghan hook in tks, 7 sts for 9 rows equals 2”
Special Stitches
Video Support available for Tunisian Knit Stitch in both right- and left-handed versions on my YouTube channel here.
Tunisian knit stitch (tks): Insert hook between front and back vertical bars coming out at back of work, yo, draw up a lp.
Additional Abbreviations
beg=beginning; ch=chain; lp(s)=loop(s); RS=right side; rem=remaining; rep=repeat; rnd(s)=round(s); sc=single crochet; sk=skip; sl=slip; sp(s)=space(s); st(s)=stitch(es); WS=wrong side; yo=yarn over
Pattern Note
Unless instructed otherwise, close all rows as follows: Yo, draw through 1 lp, [yo, draw through 2 lps] across (1 lp rem on hook counts as first lp of next row throughout).
Front Side of Bag
Row 1: With afghan hook, ch 21, insert hook in 2nd ch from hook, yo, draw up a lp, [insert hook in next ch, yo, draw up a lp] across to end—21 sts. Close normally.
Row 2: Sk first vertical bar, tks across to within last 2 sts. Close normally, leaving last 2 sts unworked—19 sts.
Rows 3-10: Rep row 2. On final row, 3 sts.
Row 11: Sk first vertical bar, 2 tks, tks in each of 2 skipped sts from rows 2-10 below—21 sts. Close normally.
Rows 12-100: Rep rows 2-11 consecutively.
Rows 101-110: Rep rows 2-10.
Row 111: With regular crochet hook, sk first vertical bar, working as for tks, sc in each of 2 sts and in each of 2 skipped sts from rows 101-110 below, 4 sc evenly along short edges of rows along center of bottom of bag and sc across unused lps of foundation ch of row 1, turn—45 sc.
Rows 112-113: Ch 1, sc in each sc across, turn. Fasten off after final row.
Rep Rows 1-113 for Back Side of Bag, except do not fasten off after final row. With WS facing out, sl st in front lps of sc across, working through both thicknesses of bag sides, turn. Beg working in rnds around outer edge of circle now formed.
Rnd 114: (RS) Ch 1, sc in sides of each row around, sl st to first sc. Fasten off.
Gusset (make 2)
Row 1: With afghan hook, ch 9, insert hook in 2nd ch from hook, yo, draw up a lp, [insert hook in next ch, yo, draw up a lp] across to end—9 sts. Close normally.
Rows 2-35: Sk first vertical bar, 8 tks—9 sts. Close normally.
Row 36: With regular crochet hook, sk first vertical bar, working as for tks, sc inserting hook into 2 sts at the same time—4 sc. Fasten off.
Assembly
Position Gussets on side of bag matching short edges of row 1 of Gussets to joining of rows 111-113 of bag, pinning as necessary to maintain position. With regular crochet hook, join yarn with sl st to beg working around entire bag, joining all pieces together. Ch 1, sc around entire bag, working through both thicknesses where bag sides meet Gussets, sl st to first sc. Fasten off.
Closing Tab
Row 1: With regular crochet hook, join yarn with sl st on the back side of bag to begin working along center 8 sc at center of top of bag from rnd 114, ch 1, 8 sc across, turn.
Rows 2-12: Ch 1, sc across, turn.
Row 13: Ch 1, 2 sc, ch 3, sk 4 sc, 2 sc, turn.
Row 14: Ch 1, 2 sc, 3 sc in ch-3 sp, 2 sc. Fasten off.
Finishing
Attach button adjacent to button hole of Closing Tab. Using needle and yarn, attach handles. Weave in all ends securely.