Strobile
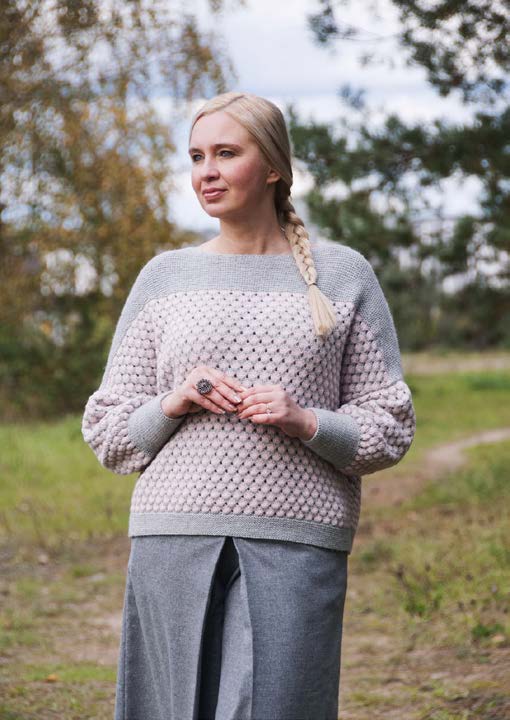
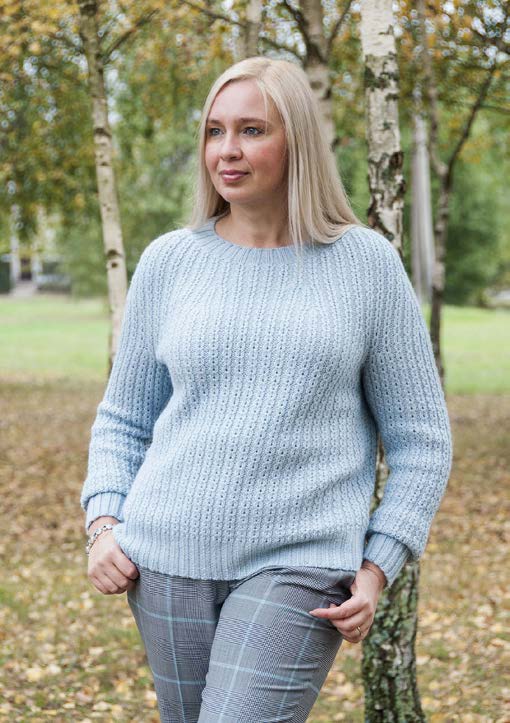
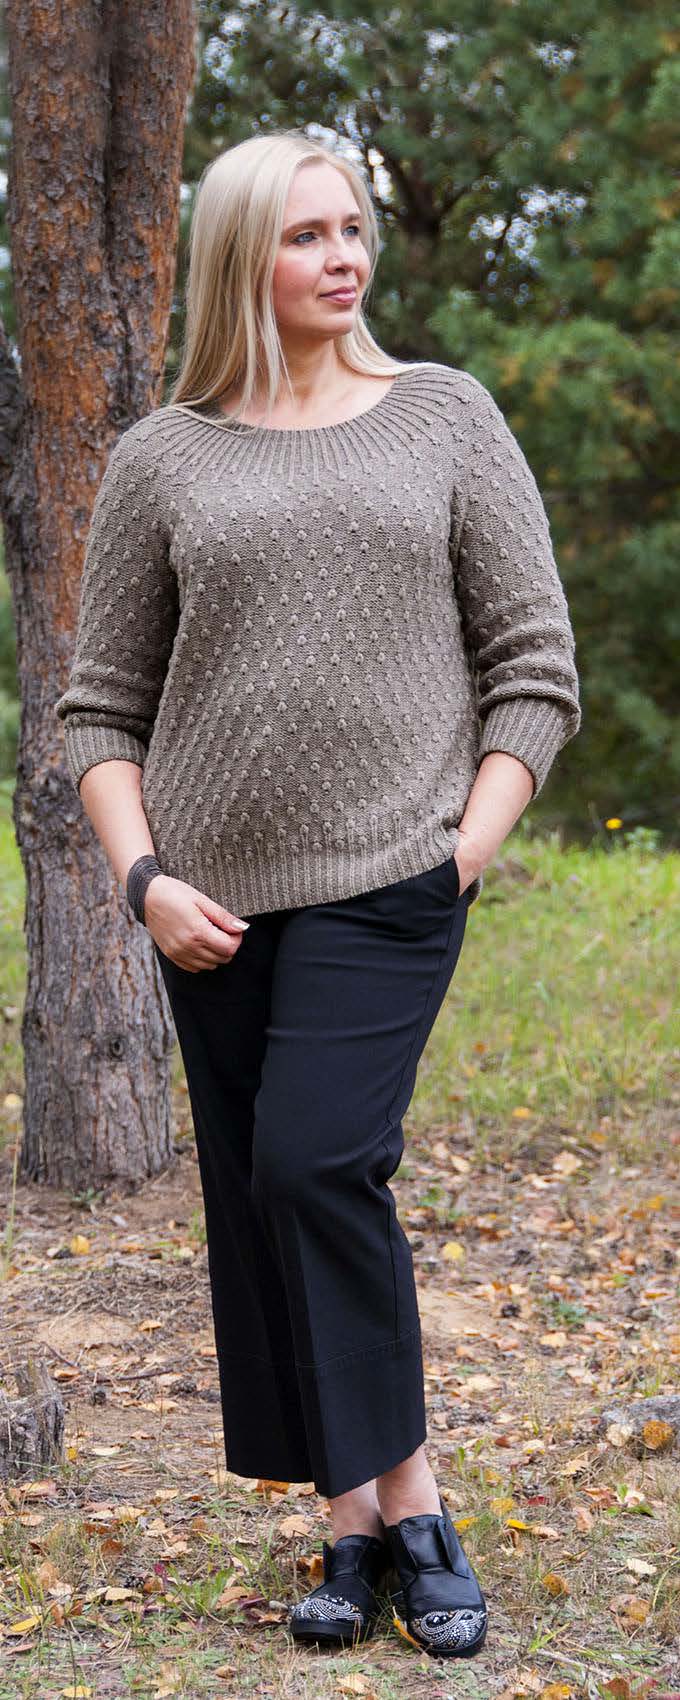
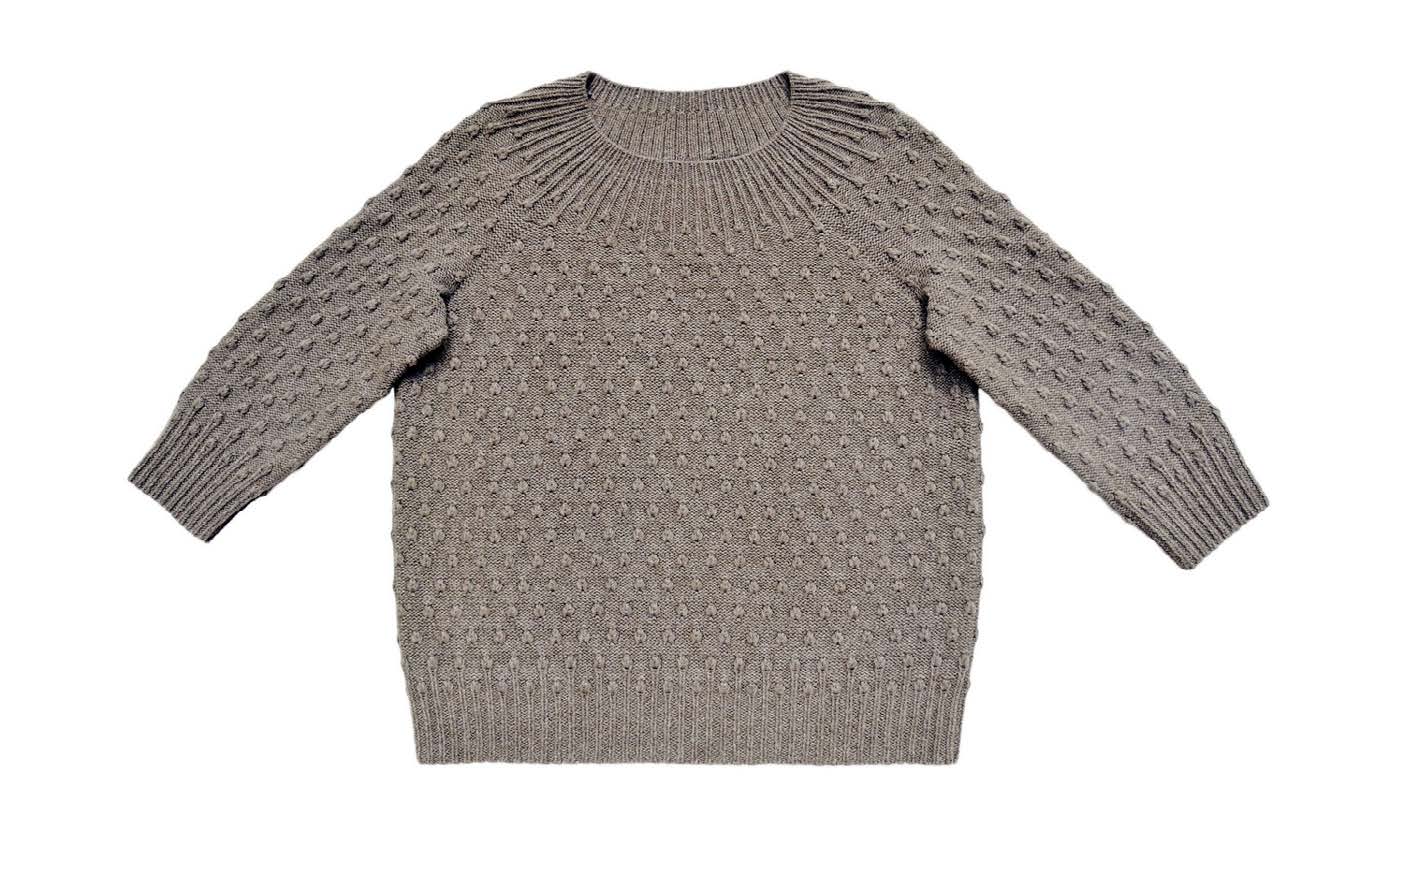
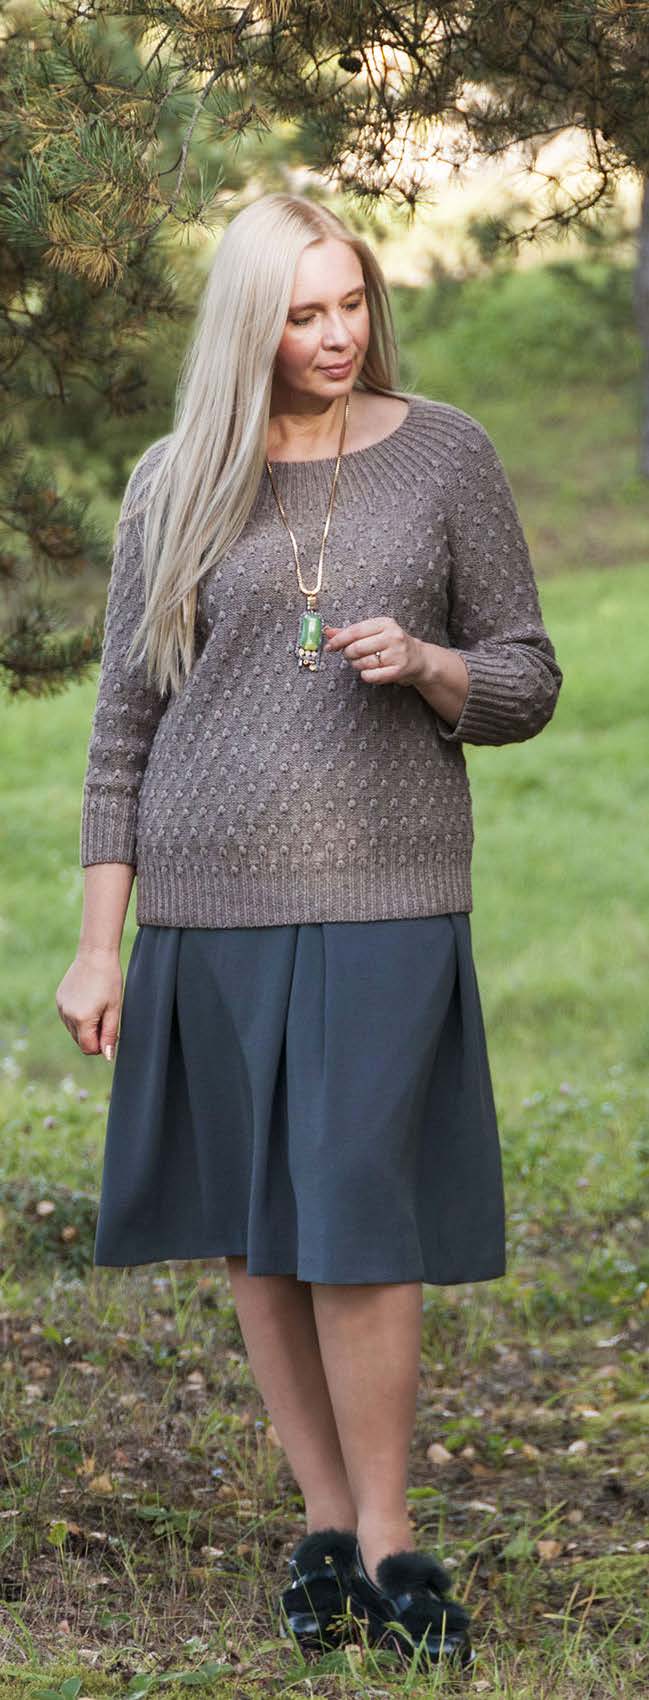
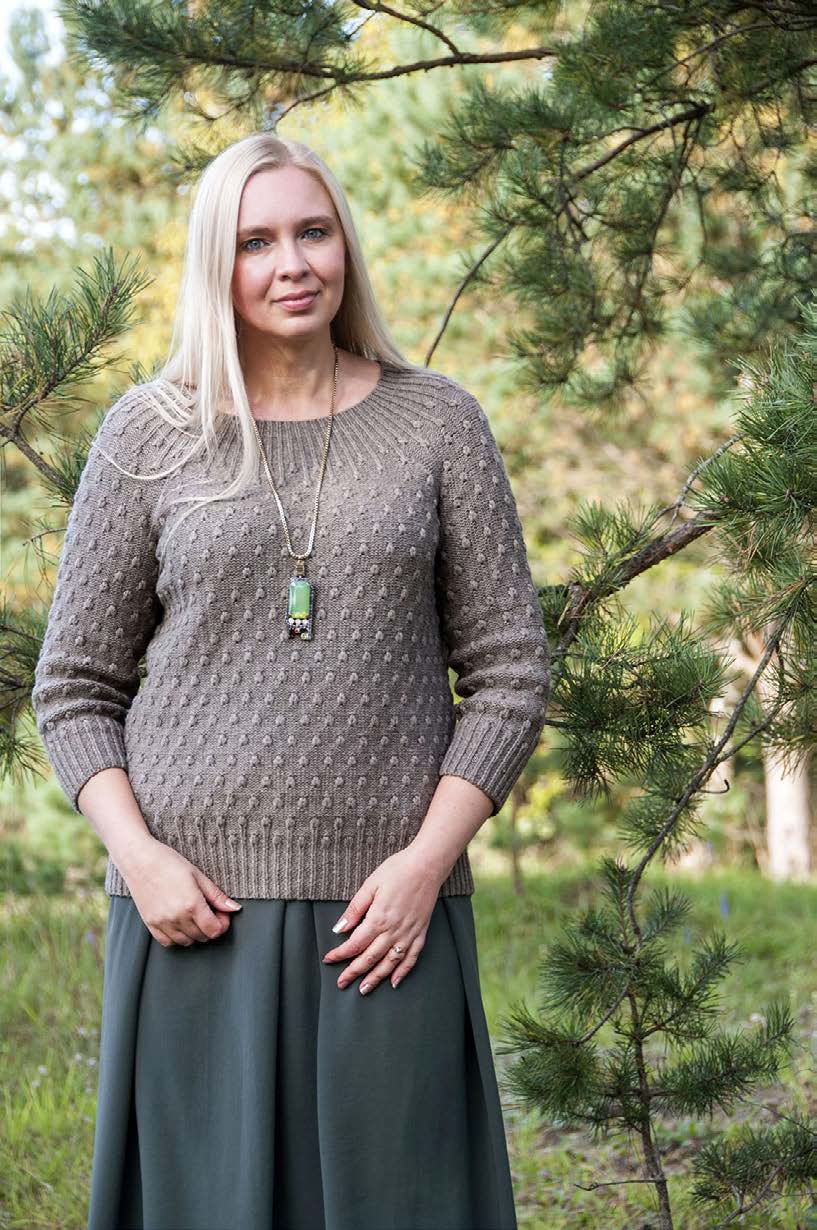
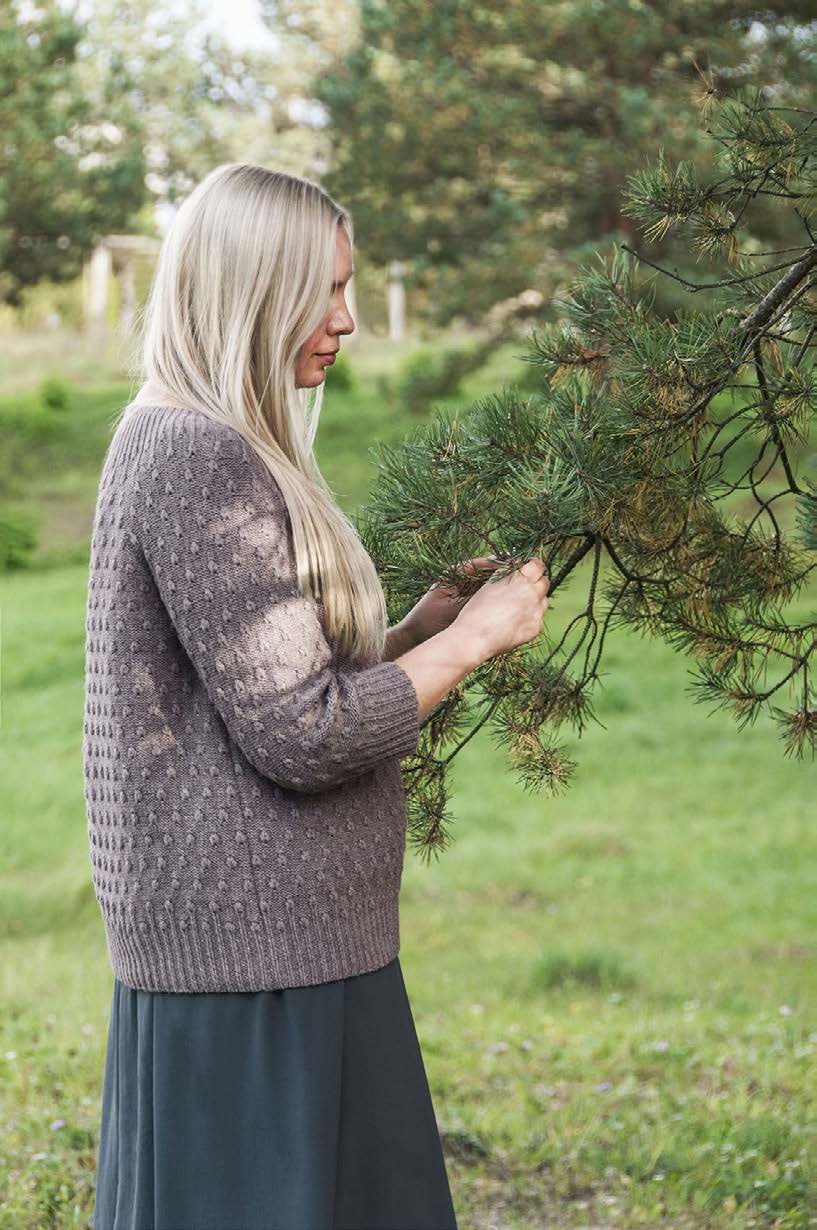
Jumper Strobile
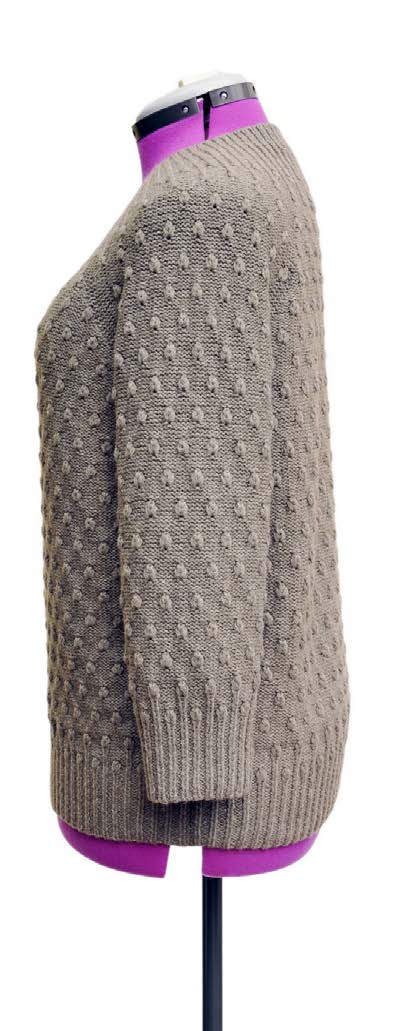
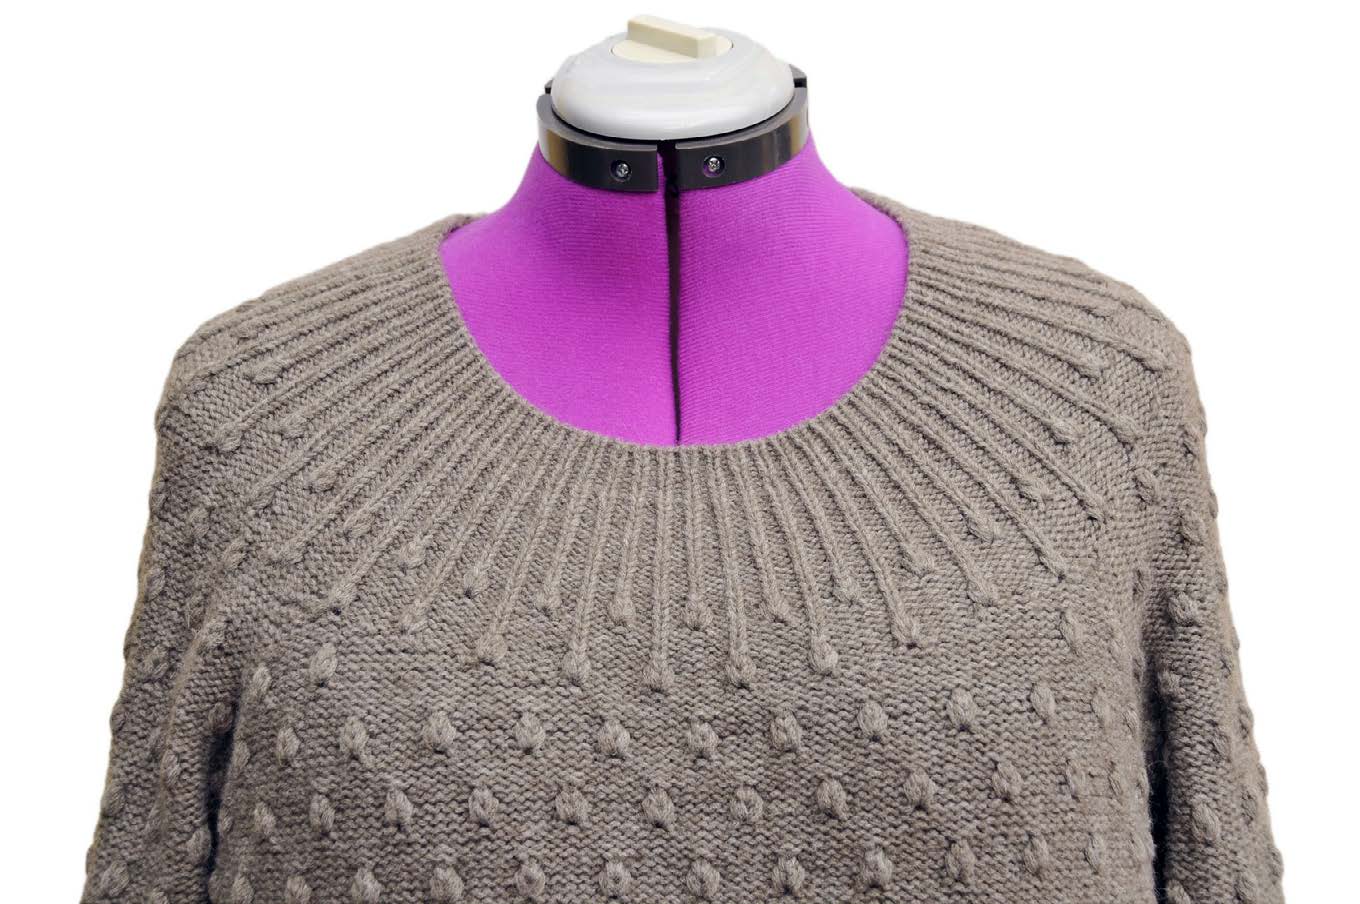
The forms of nature will never cease to amaze. The most common cone fascinates with its symmetry
and repetitive motifs arranged in a spiral; it seems that it was lathed by an outstanding engineer on a
machine designed to lathe super-precise parts. Repeating the image of an ordinary cone is not an easy
task. We must come up with relief and depth, repetitive motives and the appearance of a spiral, open
up and close again.
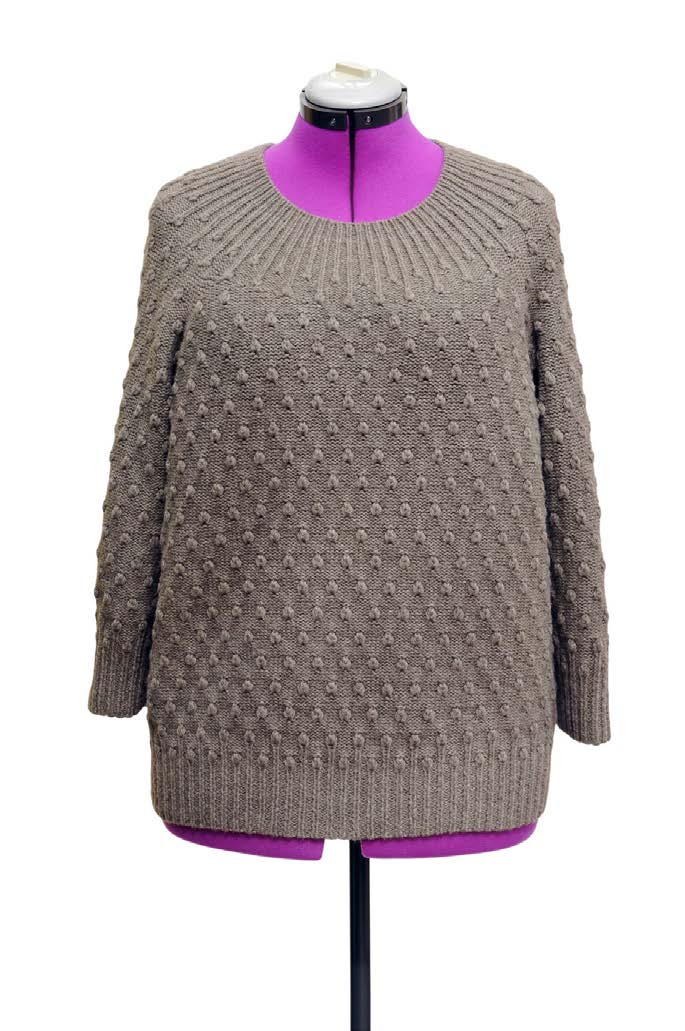
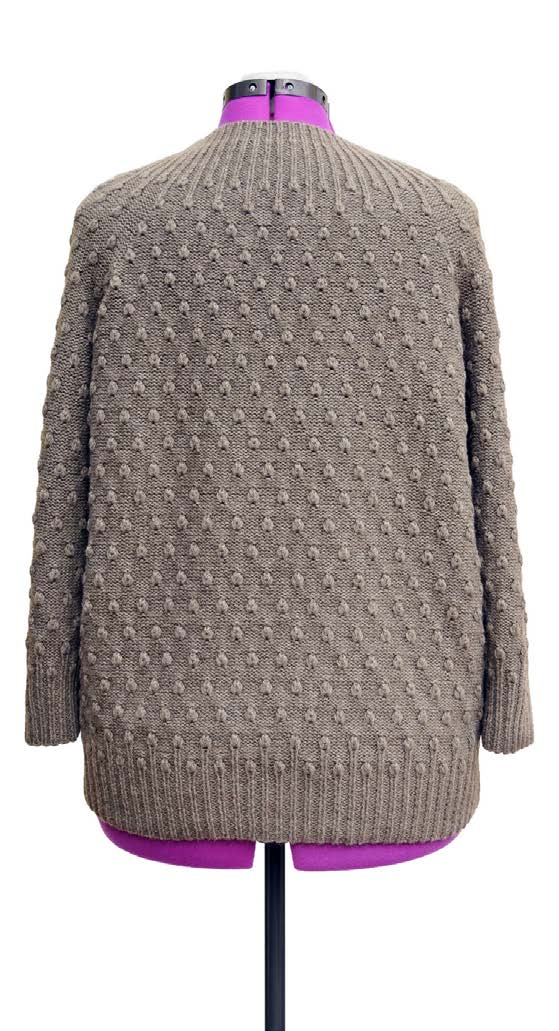
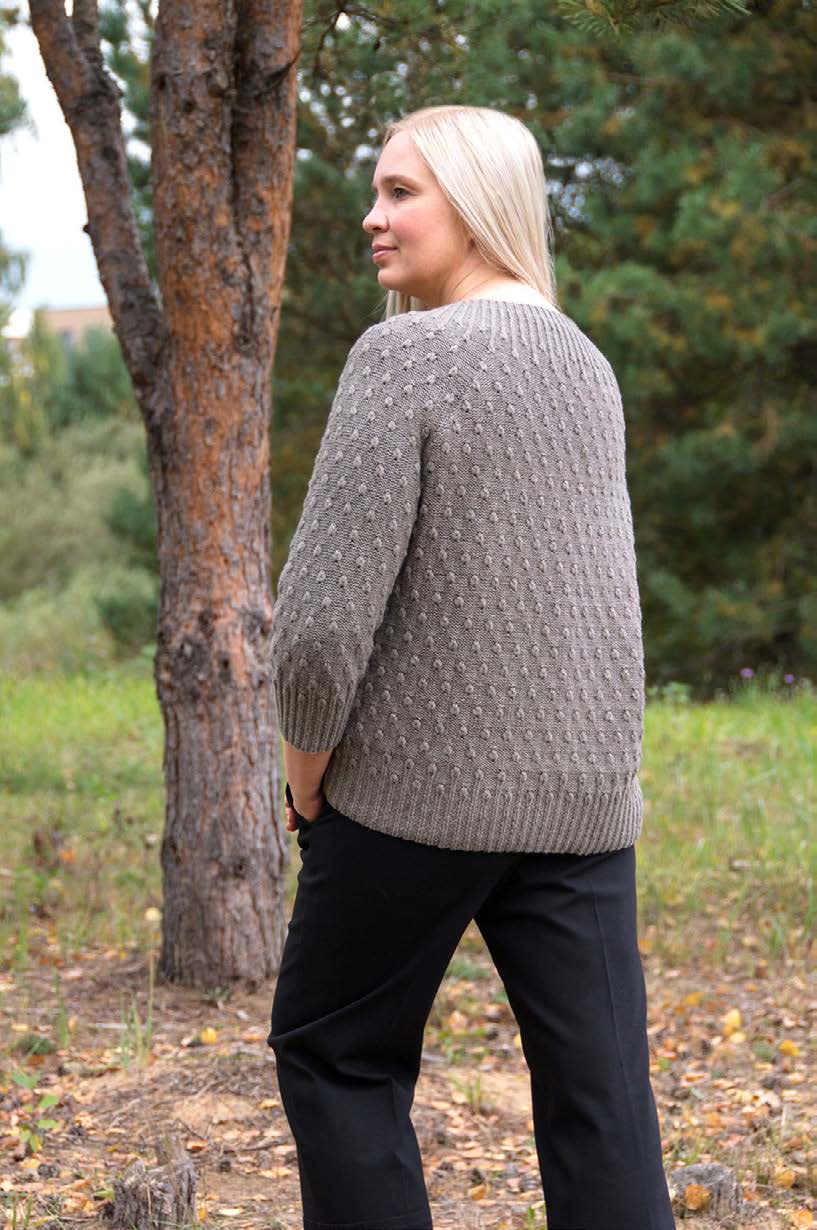
The front, the back, and sleeves are worked separately from the lower edge to the underarms. The
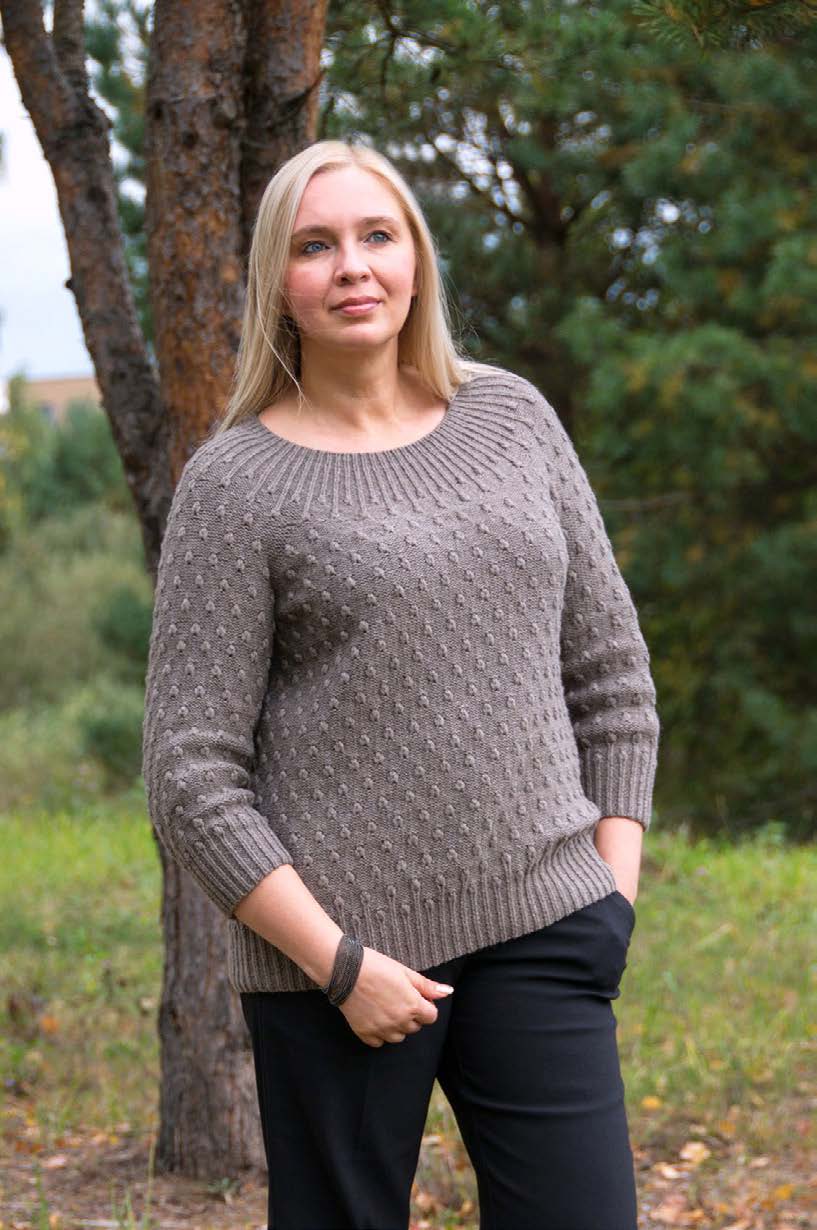
pieces then are joined, and the yoke is worked in the round. The yoke here consists of three levels. The
lower yoke is shaped anatomically and is interrupted halfway, the middle one shapes the back neck
of the jumper for convenience and comfort; the third level is designed as a simple round yoke, only
here the ribbed pattern gradually shrinks itself, allowing you to narrow the yoke naturally. The yoke is
finished up with a neckline band that enhances the effect of decreasing. In the area of armpits, it is
recommended to skip the bobbles to avoid felting during friction.
Size: XXS-XS (S-M, L-XL, XXL, XXXL) 80-88 (90-98, 100-108, 110-120, 122-132) cm Bust circumference: Hip circumference: 84-92 (94-102, 104-112, 114-124, 126-136) cm Finished dimensions (circumference at bust): 94 (106, 117, 128, 140) cm A-C (A-C, A-C, D-E, D-E) Bust cup size: Height: 165-175 cm Intended ease at bust: on average 8-15 cm. Sample shown on a model is size L-XL with 13 cm of positive ease. 21 sts and 34,5 rows in Strobile stitch pattern = 10x10 cm using US5 (3,75 mm) needles. If the gauge you’ve Gauge: got differs from the given gauge, the measurements of pieces and the finished garment will be different from what should be in your size. If the pattern does not contain a suitable size, slightly changing the gauge, you can adjust the size.
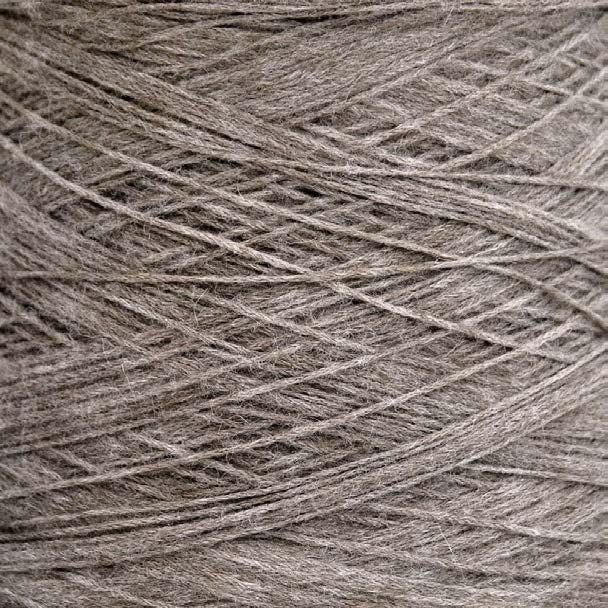
Difficulty level: Yarn: Filati BE.MI.VA Richard (on cone), 40% Baby alpaca, 30% wool, 30% acryl, 450 m/100 g, approx. 550 (600, 675, 750, 825) g in greyish brown color. The jumper is knitted in 2 strands; final yardage is 225 m/100 g or 1235 (1350, 1500, 1680, 1850) m in total. Needles and additional tools: straight knitting needles US4 (3,5 mm) and US5 (3,75 mm), circular needles US3 (3,25 mm), US4 (3,5 mm) and US5 (3,75 mm); blunt tapestry needle; additional circular needles for transferring sts; locking markers.
Abbreviations
st/sts – stitch/stitches k – knit p – purl ssk – slip slip knit ssp – slip slip purl k2tog – knit 2 stitches together p2tog – purl 2 stitches together RS – right side WS – wrong side CO – cast on BO – bind off (bound off) Rep – repeat M – marker All images, text, and illustrations © Aistė Butkevičienė, 2018-2021. For personal use only.
Stitch patterns and techniques
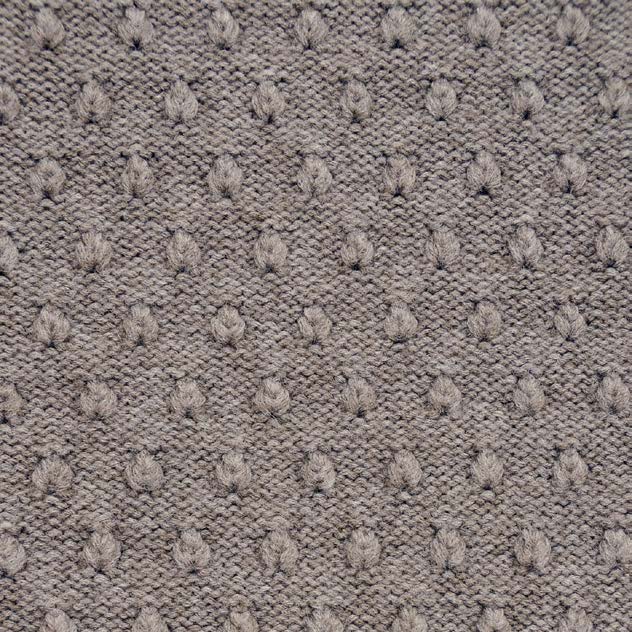
St pattern Strobile. See charts on page 5. Rib 1х2, flat knitting. Row 1 (RS): selvage st, p1, k1, p2. Rep from * to end. Row 2 (WS): selvage st, k1, p1, k2. Rep from * to end. Rib 1х2, knitting in the round. k1, p2. Rep from * to end. Rib 1х1, knitting in the round. k1, p1. Rep from * to end. Reverse Stockinette St. All RS rows – purl, all WS rows – knit. Alignment row is used for flattering steps which were created while working on short rows. Pick up the wrap onto the left-hand needle, releasing the stitch which was wrapped and work them together. The wrap should always stay on WS. Purled selvage st (braid). Slip the first st onto the right- hand needle at the beginning of each row. The last st of every RS row – purl; the last st of every WS row – knit. Transfer working yarn avoiding wrapping the first stitch. 3 Needle Join and Bind Off method. Insert the right- hand needle into selvage st on both needles and work them together. There is one st on right-hand needle, as well as one st is joined and bound off. Insert the right- hand needle into the first st on both needles and work them together. Pull the st through the st on the right- hand needle. Rep until the required number of sts are joined and bound off.
Notes
- Measurements are given in a metric system. To convert into inches, divide by 2,54. 2. Read all the instructions carefully before beginning. 3. The first and the last sts along all details are purled selvage sts (braid), even if it’s not mentioned further in the pattern. 4. While casting on and binding off, leave long enough yarn tails for seaming or finishing. 5. The instructions are for size XXS-XS, numbers in brackets are for sizes S-M, L-XL, XXL, and XXXL respectively. If there is only one number, it belongs to all sizes. 6. When counting rows, the cast-on and set-up rows are not taken into account. 7. When counting stitches, consider that one Pattern Rep is equal to 6 stitches, even if the number of stitches in the 5th, 6th, 13th, and 14th rows of the Pattern Rep increases to 8. 8. Work the back the last. 9. Length adjustment (body and/or sleeves) is only possible by the whole Pattern Rep (16 rows).
Schematics (cm)
9,5 (9,5, 9,5, 11,5, 11,5) ) 9 2 3 1
, 9( 3 24 ,
3 , 7 ,
24 0
,, 1 2 ) (
5 , 1 2 2,5 (2,5, 2,5, 4,5, 4,5)
3 9
( )3 5 9 , , 3 9 7 3,
3 , 5, 5 , , 3 9 3, 5 )
, 5 , 1
, (
47 (53, 58,5, 64, 70) All images, text, and illustrations © Aistė Butkevičienė, 2018-2021. For personal use only.
Strobile st pattern charts

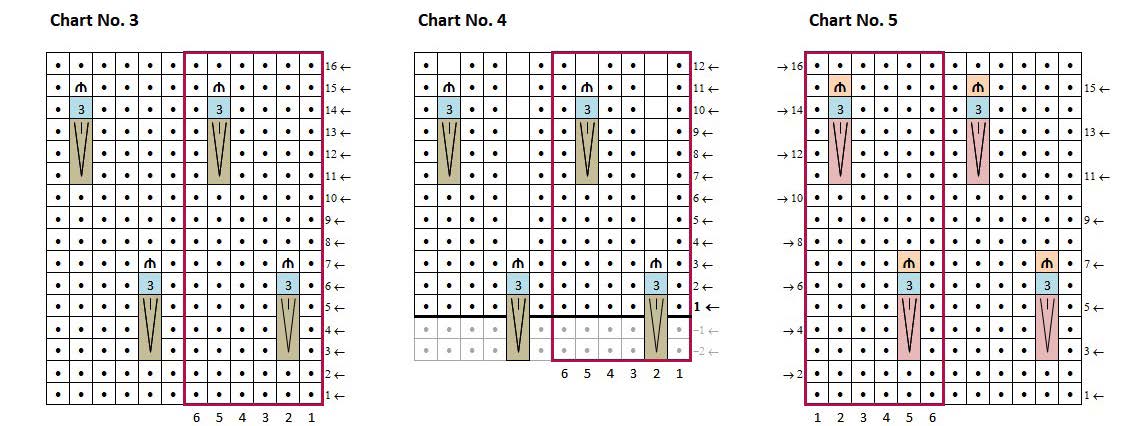
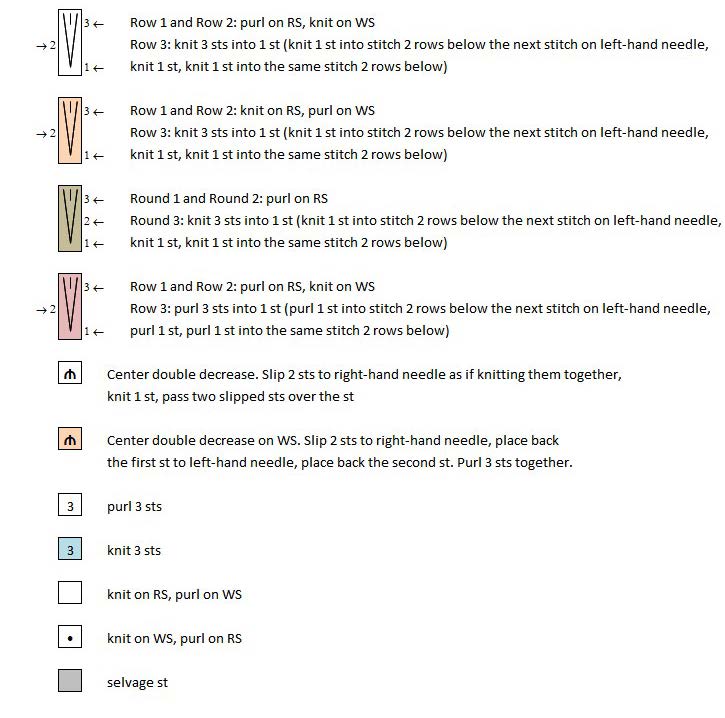
Work the next RS row to last 12 sts, wrap the next st
Front
and turn. Work a WS row to last 12 sts, wrap the next st and turn. Work the next RS and WS alignment rows, With US4 (3,5 mm) straight needles CO 69 (77, 85, 93, working over wrapped sts. Work even for 4 more rows. 101) sts using an Italian Cast On Method. In the next WS row work a set-up row for 1x2 rib: selvage st, k1, Work the next RS row to last 15 sts, wrap the next st *p1, knit 2 sts into 1 st (see Step-by-step tutorial on the and turn. Work a WS row to last 15 sts, wrap the next last page). Rep from * to last 3 sts, p1, k2. There are 101 st and turn. Work the next RS and WS alignment rows, (113, 125, 137, 149) sts on needles. In the next RS row working over wrapped sts. begin to work in 1x2 rib. Work for 26 rows, end with a WS row. ** Switch to US5 (3,75 mm) needles. Work Row For sizes XXL, XXXL only: st 1 of Chart No. 2, beginning with a selvage st and the 1 Work the next RS row to last 3 sts, wrap the next st and stthstst (1, 4, 1, 1) st of the Chart. Work for 12 rows, then turn. Work a WS row to last 3 sts, wrap the next st and follow Chart No. 1, beginning with a selvage st and the turn. Work the next RS row to last 6 sts, wrap the next ststthstst 1 (1, 4, 1, 1) st of the Chart. Work even following st and turn. Work a WS row to last 6 sts, wrap the next Chart No. 1 for 88 (88, 80, 80, 80) rows in total, end st and turn. Work the next RS and WS alignment rows, ththththth with a WS row and the 8 (8, 16, 16, 16) row of the working over wrapped sts. Work even for 2 more rows. Pattern Rep.
Side scattered bust darts
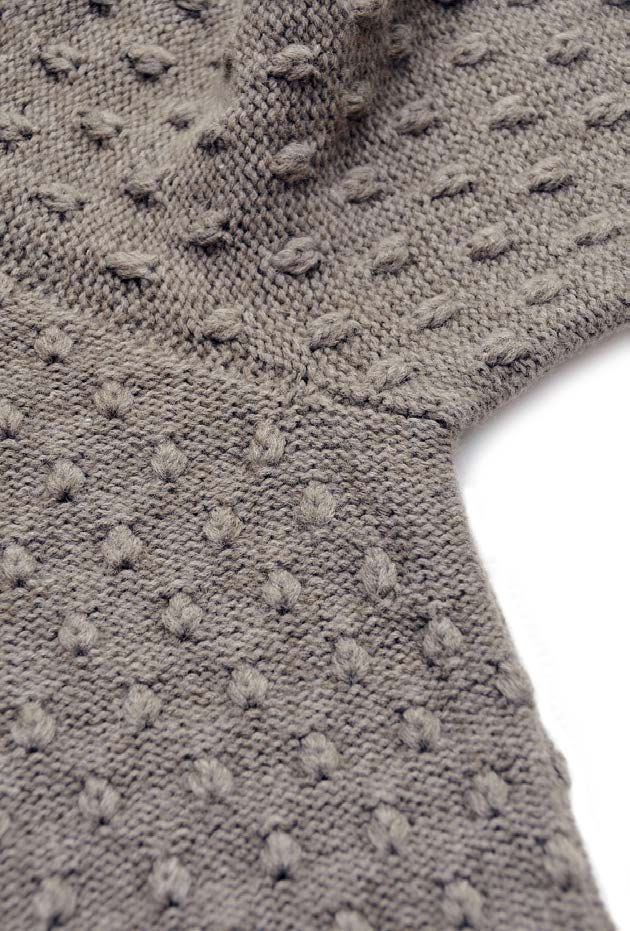
Work the next RS row to last 6 sts, wrap the next st and turn. Work a WS row to last 6 sts, wrap the next st and From this point forward, and before joining turn. Work the next RS row to last 9 sts, wrap the next the pieces to a yoke, skip bobbles, starting st and turn. Work a WS row to last 9 sts, wrap the next from the short rows turns towards the st and turn. Work the next RS and WS alignment rows, edges, working those stitches in Reverse working over wrapped sts. Work even for 2 more rows. Stockinette St (see the picture below). Work the next RS row to last 9 sts, wrap the next st and turn. Work a WS row to last 9 sts, wrap the next st and For sizes XXS-XS, S-M, L-XL only: turn. Work the next RS row to last 12 sts, wrap the next Work the next RS row to last 6 sts, wrap the next st and st and turn. Work a WS row to last 12 sts, wrap the next turn. Work a WS row to last 6 sts, wrap the next st and st and turn. Work the next RS and WS alignment rows, turn. Work the next RS and WS alignment rows, working working over wrapped sts. Work even for 2 more rows. over wrapped sts. Work even for 4 more rows. Work the next RS row to last 12 sts, wrap the next st Work the next RS row to last 9 sts, wrap the next st and and turn. Work a WS row to last 12 sts, wrap the next st turn. Work a WS row to last 9 sts, wrap the next st and and turn. Work the next RS row to last 15 sts, wrap the turn. Work the next RS and WS alignment rows, working next st and turn. Work a WS row to last 15 sts, wrap the over wrapped sts. Work even for 4 more rows. next st and turn. Work the next RS and WS alignment rows, working over wrapped sts. For all sizes:
The height of side scaterred bust darts is equal to 8 8 (8, 8, 16, 16) additional rows. Continue to work even following Chart No. 1 for 120 (120, 112, 112, 112) rows in total, end with a WS row and the 8th (8th, 16th, 16th, 16th) row of the Pattern Rep. Count rows in the front center taking into account 8 (8, 8, 16, 16) additional rows of bust darts. Transfer all sts to a spare circular needle. Break yarn leaving long enough tail for joining sts of an underarm. All images, text, and illustrations © Aistė Butkevičienė, 2018-2021. For personal use only.
Sleeves (make 2)
With US4 (3,5 mm) straight needles CO 41 (45, 49, 53, 53) sts using an Italian Cast On Method. In the next WS row work a set-up row for 1x2 rib: selvage st, k1, *p1, knit 2 sts into 1 st (see the Step-by-step tutorial on the last page). Rep from * to last 3 sts, p1, k2. There are 59 (65, 71, 77, 77) sts on needles. In the next RS row begin to work in 1x2 rib. Work for 26 rows, end with a WS row. ** Switch to US5 (3,75 mm) needles. Work Row 1 of thth Chart No. 2, beginning with a selvage st and the 4 (4, stthth 1, 4, 4) st of the Chart. Work for 12 rows, then follow thth Chart No. 1, beginning with a selvage st and the 4 (4, stthth 1, 4, 4) st of the Chart and in the same row work an increase row for sleeve widening. Increase row for sleeve widening: selvage st, pick up a st, which is one row below the next st on the left- hand needle and purl, work row to last st, pick up a st, which is one row below the st you’ve just worked, and purl, p1. 2 sts increased. Work increased sts into the stitch pattern (read the note below). Make bobbles over increased sts only when they are formed no closer than 3-4 sts from the edge. Otherwise, work increased sts in Reverse Stockinette St. Rep an increase row for sleeve widening 3 (4, 5, 6, 7) more times every 24th (18th, 14th, 10th, 8th) row. There are 67 (75, 83, 91, 93) sts on needles. Continue to work even following Chart No. 1 for 96 (96, 88, 80, 80) rows in total, end with a WS row and the 16th (16th, 8th, 16th, 16th) row of the Pattern Rep. While working the last 1-1,5 Pattern Reps, skip some of the edge bobbles in the underarm area as described and illustrated on page 6. Transfer all sts to a spare circular needle. Break yarn leaving long enough tail for joining sts of an underarm.
Back
Work the same as for the front until **. Switch to US5 (3,75 mm) needles. Work Row 1 of Chart No. 2, ththstthth beginning with a selvage st and the 4 (4, 1, 4, 4) st of the Chart. Work for 12 rows, then follow Chart No. 1, ththstthth beginning with a selvage st and the 4 (4, 1, 4, 4) st of the Chart. Work even following Chart No. 1 for 112 (112, 104, 96, 96) rows in total, end with a WS row and ththththth the 16 (16, 8, 16, 16) row of the Pattern Rep. While working the last 1,5-2 Pattern Reps, skip some of the edge bobbles in the underarm area as described and illustrated on page 6. Transfer all sts to a spare circular needle. Do not break the yarn (further – working yarn).
Joining pieces to a yoke
Switch to US5 (3,75 mm) circular needle (further – main needle). Turn the right sleeve with a WS up. Put the back piece under the right sleeve with an RS up. With working yarn join and bind off 6 (7, 8, 9, 10) sts using a 3 Needle Join and Bind Off method. 6 (7, 8, 9, 10) sts of an underarm are joined and bound off. The last st of an underarm place onto the main needle and mark it with a locking marker M1. Work the next row of the back with working yarn and main needle to last 6 (7, 8, 9, 10) sts, slip the next 6 (7, 8, 9, 10) sts to the right-hand needle (no actual stitching involved). Leave the working yarn temporarily. Turn the work with a WS up. Put the left sleeve under the back with an RS up. With the yarn tail left when finishing the left sleeve, join and bind off 6 (7, 8, 9, 10) sts using a 3 Needle Join and Bind Off method. 6 (7, 8, 9, 10) sts of an underarm are joined and bound off. The last st of an underarm place onto the main needle and mark it with a locking marker M2. Work the next row of the left sleeve with working yarn and main needle to last 10 (11, 12, 13, 15) sts, slip the next 10 (11, 12, 13, 15) sts to the right-hand needle (no actual stitching involved). Leave the working yarn temporarily. Turn the work with a WS up. Put the front under the left sleeve with an RS up. With the yarn tail left when finishing the front, join and bind off 10 (11, 12, 13, 15) sts using a 3 Needle Join and Bind Off method. 10 (11, 12, 13, 15) sts of an underarm are joined and bound off. The last st of an underarm place onto the main needle and mark it with a locking marker M3. Work the next row of the front with working yarn and main needle to last 10 (11, 12, 13, 15) sts, slip the next 10 (11, 12, 13, 15) sts to the right-hand needle (no actual stitching involved). Leave the working yarn temporarily. Turn the work with a WS up. Put the right sleeve under the front with an RS up. With the yarn tail left when finishing the right sleeve, join and bind off 10 (11, 12, 13, 15) sts using a 3 Needle Join and Bind Off method. 10 (11, 12, 13, 15) sts of an underarm are joined and bound off. The last st of an underarm place onto the main needle and mark it with a locking marker M4. Work the next row of the right sleeve with working yarn and main needle to the end of the round. The joining round is the first round of the yoke. There are 276 (308, 340, 372, 388) sts on main needle. Work marked sts in Reverse Stockinette st further. All images, text, and illustrations © Aistė Butkevičienė, 2018-2021. For personal use only.
Location of markers
While working on the yoke and back neck, skip bobbles when there are no available sts to complete them, working those sts in Reverse Stockinette St. If there are available М1М2 sts and rows to complete a bobble (even close or next to raglan decreases, also over short rows) bobbles should have been made, thus trying to avoid empty (unfilled) areas.
Lower yoke
Back One round of the yoke is completed. Continue to work yoke in rounds and follow Chart No. 3. In the next round, work decreases for raglan lines. Right sleeveLeft sleeve Decreases for raglan lines: work the М1 st, p2tog, work to 2 sts before М2 st, ssp, work the M2 st, p2tog, work to 2 sts before М3 st, ssp, work the М3 М6М5 st, p2tog, work to 2 sts before М4st, ssp, work the М4 st, p2tog, work to 2 sts before М1, ssp. 8 sts decreased. Front Rep decreases for raglan lines 2 more times. 4 rounds of the yoke are completed. There are 252 (284, 316, 348, 364) sts on needle.М4М3
From this point forward, decreases for raglan lines are different on individual parts of the yoke. Continue to work on decreases, as established further: nd on the back after М1 st and before М2 st every 2 (–, rdnd –, every, every) round 2 (0, 0, 3, 3) times, every 3 (2, ndndrdnd 2, alternating every 2 and every 3, every 2) round nd 12 (24, 24, 14, 30) times, – (–, –, every 2, –) round 0 (0, 0, 12, 0) times; on the front after М3 st and before М4 st every round 2 (2, 3, 3, 6) times, then every 2nd (alternating every and every 2nd, alternating every and every 2nd, alternating every and every 2nd, alternating every and every 2nd) round 8 (14, 15, 20, 18) times; on the back side of both sleeves after М2 sts and before М1 sts every 2nd round one time, then every 12th (16th, 12th, 10th, 7th) round 2 (2, 3, 6, 8) times; on the front side of both sleeves before М3 st and ndth after М4 st every 2 round one time, then every 8 ththththth (11, 8, 5, alternating every 4 and every 5) round 2 (2, 3, 6, 7) times. The last (upper) decreases for raglan lines may be finished in the alignment round as well as in the following round.
Back neck shaping
Work for a total of 10 (18, 18, 26, 26) yoke rounds, end before М1 st. Place locking markers М5 (for the left side of the front neck) and М6 (for the right side of the front neck) marking 15 (15, 19, 23, 23) center front sts. Continuing on decreases as established earlier, in the next 11th (19th, 19th, 27th, 27th) round work to 1 st before М5, wrap the next st and turn. From this point, the back neck is shaped with short rows. Decreases for raglan lines now are worked on WS also. Work decreases on WS as k2tog and ssk respectively. Starting with a current WS row, in the section between M5 and M1, knitting is ahead of the rest of the section between М1 and М6 by one row. In this section (between М1 and М6) read the stitch pattern from WS, according to Chart No. 5, starting with the 3rd row of the Chart. All images, text, and illustrations © Aistė Butkevičienė, 2018-2021. For personal use only.
In the next WS row work to 1 st before М6, wrap the
Neckline band
next st and turn. *In the next RS row work to 4 (4, 4, 3, 3) sts before the wrapped st, wrap the next st and Switch to US3 (3,25 mm) circular needle. Work the turn. Work the next WS row to 4 (4, 4, 3, 3) sts before next round in 1x1 rib, working p2tog over every 2 purl the wrapped st, wrap the next st and turn. Rep from * sts. There are 128 (128, 144, 144, 144) sts on needle. 14 (14, 14, 18, 18) more times. The height of shaped Work even for 10 more rounds. End round before М1 st, back neck is 32 (32, 32, 40, 40) rows or 2 (2, 2, 2,5, 2,5) remove marker М1. Break yarn leaving long enough yarn Pattern Reps. End row before М1 st. tail for а Tubular Bind Off. Continue to work in rounds. Work an alignment round,
Finishing
working over wrapped sts and one more round, finishing last decreases for raglan lines. Work wrapped sts on With a tapestry needle, BO neckline sts using a Tubular the right front neck as follows: release the wrap, place Bind Off for 1x1 ribbing (no set-up rows are needed). it behind the wrapped st and purl them together. End round before М1 st. With yarn tails sew side and sleeve seams using a mattress stitch. Remove all markers except М1. There are 192 (192, 216, 216, 216) sts on needle. Insert yarn tail left when joining underarms into a tapestry needle, tighten the last underarm st and stitch
Upper yoke
around on WS, inserting the needle into back legs of adjacent stitches. Fasten and break the yarn. Rep for the Work Round 1 of Chart No. 4 and begin with a st, remaining underarm sts. starting from which the Strobile st pattern on the back and front would be continued (see the picture below). Weave in all yarn ends. Wash the garment, roll it Work for 2 rounds and switch to US4 (3,5 mm) circular between two thick bath towels and firmly press towel needle. Work following Chart No. 4 for 12 rounds in roll to squeeze out excess water. Take the garment out, total, then continue in 1x2 rib for 18 (16, 18, 16, 18) lay it out flat, block to measurements. Stretch all ribbed more rounds. End round before М1 st. hems lengthwise. Allow garment to dry completely.
Thank you for knitting!
Pattern version 1.0.eng November 2018
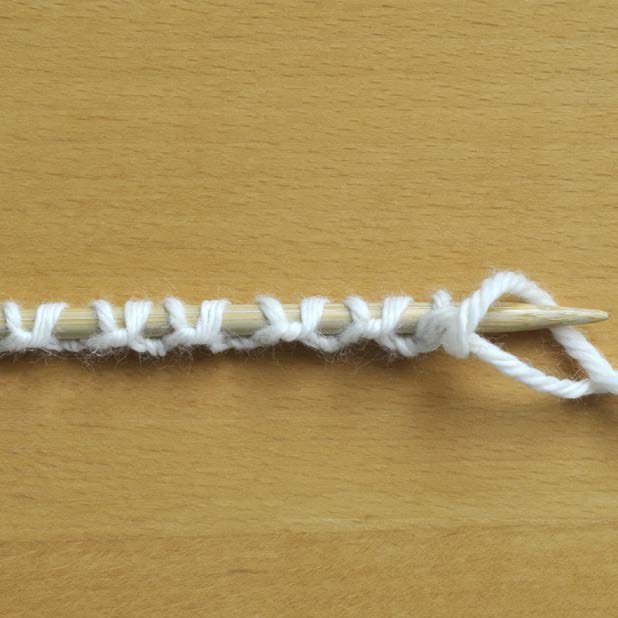
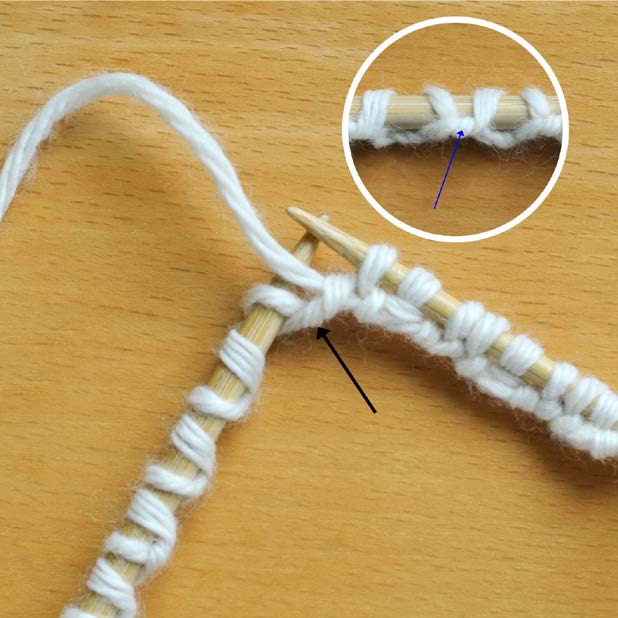
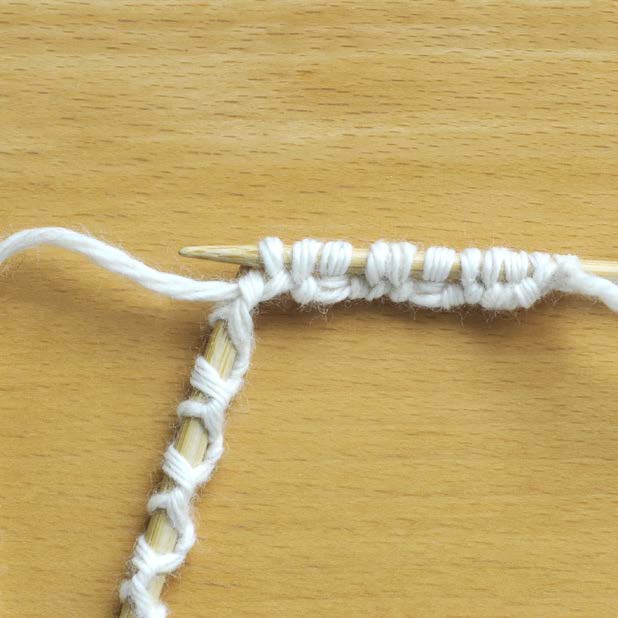
Italian Cast On Method for the 1x2 rib
- Cast on the specified number of sts using an Italian
Vilnonis
.
net
Cast On method. Purl the purl st of a CO row. 2. Knit the knit stitch. Then find a thread which lies between the stitch you’ve just knit and below the next Ravelry: aisteb1973 purl stitch. 3. Pick it up with the right-hand needle and place it on Instagram: @aisteb1973 the left-hand needle. 4. Knit the stitch you’ve just placed. Now you have two Also on JOOMAG, ISSUU and vjazhi.ru knit sts in a row. Purl the next stitch and rep from . All images, text, and illustrations © Aistė Butkevičienė, 2018-2021. For personal use only.